Easy Buttermilk Bread Recipe-So Soft & Delicious
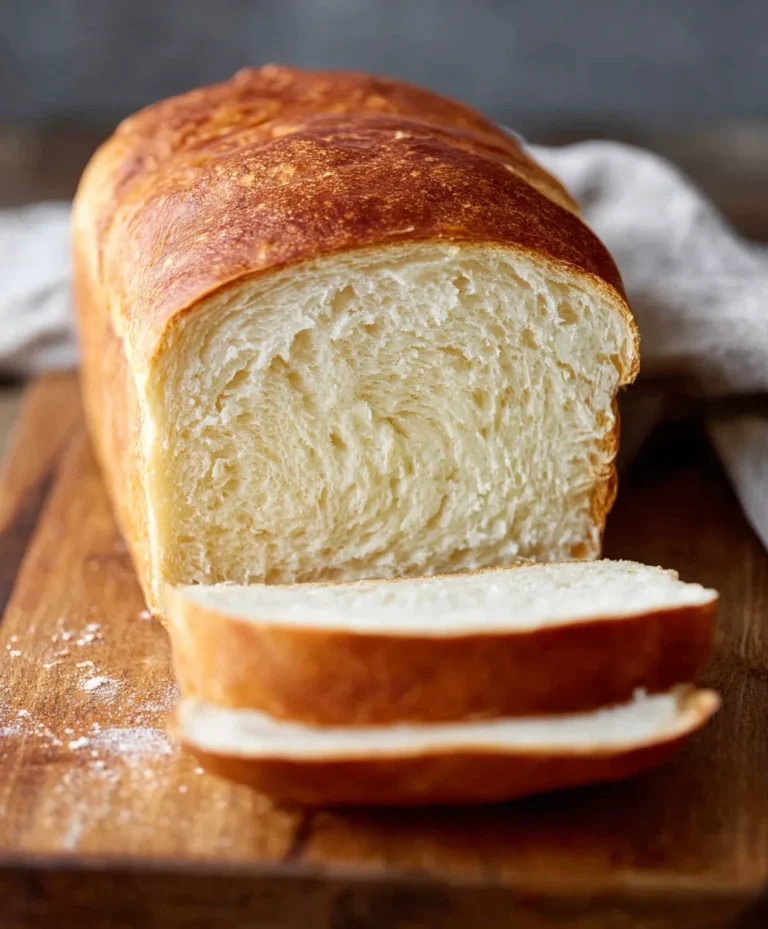
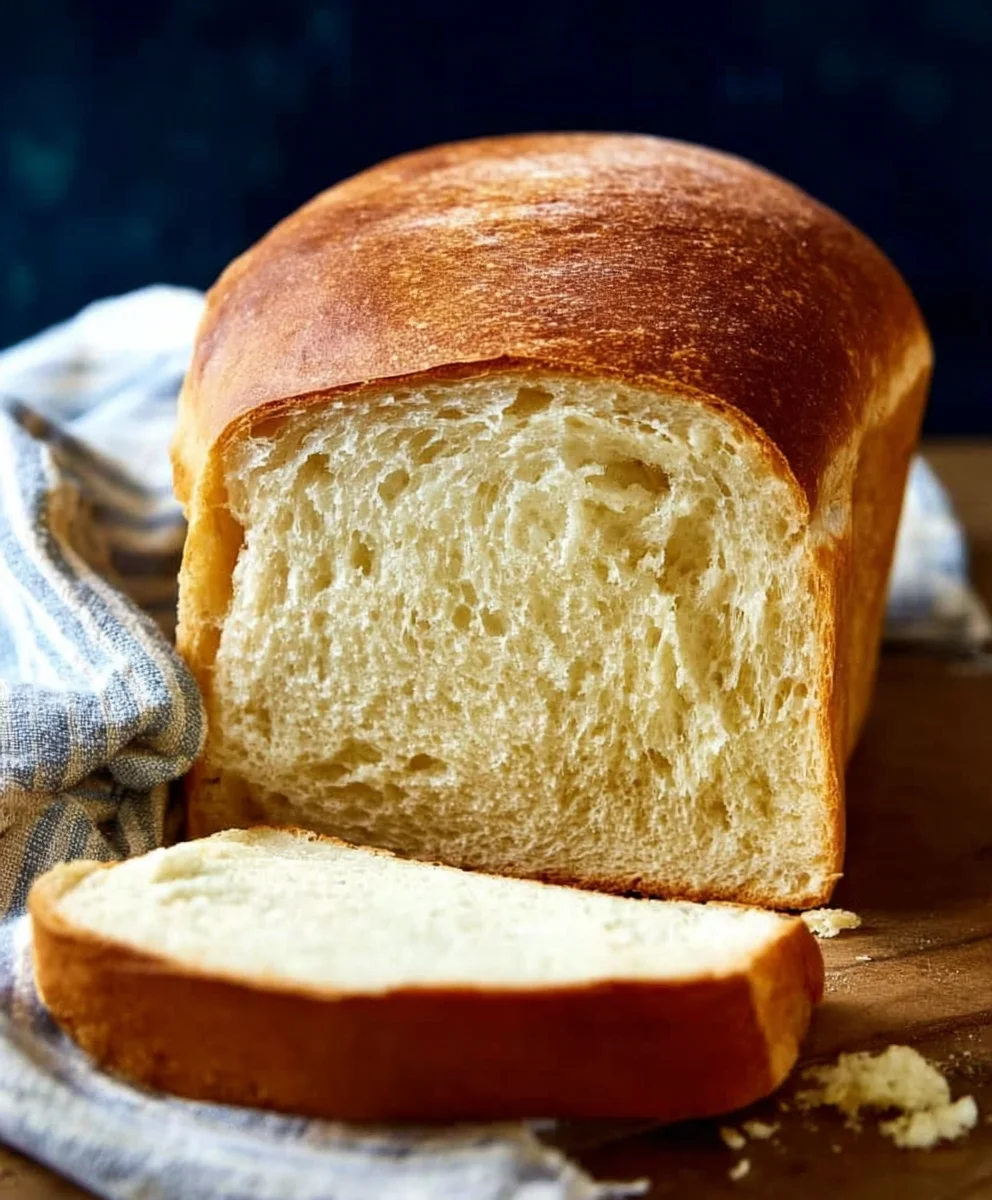
Buttermilk Bread Recipe, oh how we adore its tender crum extractb and subtly tangy flavor! There’s something undeniably comforting about a warm, freshly baked loaf of buttermilk bread, its aroma filling the kitchen and promising a delightful experience. This isn’t just any bread; it’s a testament to simplicity done exceptionally well. What draws us in, time and time again, is the incredible moistness and soft texture that only buttermilk can impart, creating a tender interior that practically melts in your mouth. It’s the perfect canvas for slathering with butter, dipping into soup, or transforming into the most delightful sandwiches. Prepare to fall in love with this classic for a reason; it’s a rewarding bake that brings pure joy to any table.
Why You’ll Love This Buttermilk Bread
This particular buttermilk bread recipe stands out because it achieves that perfect balance of light and fluffy with a satisfying chew. The secret lies in the natural leavening properties of buttermilk, which also contributes a gentle tang that cuts through the richness and makes it so wonderfully approachable. Whether you’re a seasoned baker or just starting out, this recipe is incredibly forgiving and yields consistently delicious results. Imagin extracte the satisfaction of pulling your own golden-brown loaf from the oven, knowing you created something truly special. It’s a recipe that becomes a staple, a go-to for comfort and deliciousness.
Ingredients:
- 1 packet (2 1/4 teaspoons) active dry yeast
- 1 pinch ground gin extractger
- 1 teaspoon granulated sugar
- 1/4 cup warm water (105°F – 110°F)
- 2 cups cultured buttermilk (warm, 105°F – 110°F)
- 1/3 cup honey
- 1 teaspoon kosher salt (or 3/4 teaspoon table salt)
- 3/4 teaspoon baking soda
- 6 cups bread flour (all-purpose flour can be substituted)
- 1/4 cup unsalted butter, melted and cooled to warm
Preparing the Dough: Activating the Yeast
The foundation of any great bread is its yeasgin extractTo begin this Buttermilk Bread Recipe, we need to awaken our yeast and give it a little boost. In a large mixing bowl, combine the warm water with the granulated sugar and the packet of active dry yeast. Give it a gentle stir to ensure the sugar and yeast are mostly dissolved. This step is crucial because the sugar acts as food for the yeast, and the warm water provides the ideal environment for it to become active. We’re looking for the mixture to become foamy and bubbly within about 5 to 10 minutes. This foamy cap is a visual confirmation that your yeast is alive and ready to work its magic. If you don’t see any bubbles or foam, your yeast might be past its prime, or the water may not have been the correct temperature. In that case, it’s best to start over with fresh yeast and correctly tempered water.
Incorporating Wet Ingredients and Initial Mixing
Once your yeast mixture is beautifully foamy, it’s time to introduce the other liquid ingredients. Add the warm cultured buttermilk to the bowl. The buttermilk will contribute a wonderful tang and tenderness to our bread, which is characteristic of a delicious Buttermilk Bread Recipe. Next, stir in the honey. Honey not only adds sweetness but also helps to enrich the dough and contributes to a lovely golden crust. Give everything a good whisk to combine. Now, it’s time to incorporate the dry ingredients. Add the kosher salt and baking soda to the bowl. The salt enhances the flavor and controls the yeast activity, while the baking soda works with the buttermilk to provide an extra lift and a softer cgin extract extractb. Begin adding the bread flour, one cup at a time, mixing after each addition. Initially, you can use a wooden spoon or a sturdy spatula. As the dough thickens, you’ll transition to using your hands or a stand mixer with a dough hook attachment. We are aiming for a shaggy, cohesive dough at this stage. Don’t worry if it seems a little sticky; that’s perfectly normal for this recipe.
Kneading the Dough to Develop Gluten
This is where we build the structure of our Buttermilk Bread. Once the dough has come together, turn it out onto a lightly floured surface. If you’re using a stand mixer, attach the dough hook and let it knead on a medium-low speed. The goal of kneading is to develop the gluten in the flour. Gluten is a protein network that gives bread its chewy texture and allows it to rise. Knead the dough for about 8 to 10 minutes by hand, or 6 to 8 minutes in a stand mixer. You’ll know the dough is ready when it becomes smooth, elastic, and springs back slowly when you gently poke it with a floured finger. It should also pull away cleanly from the sides of the bowl (if using a mixer) or your hands. If the dough feels too sticky, you can add a little more flour, a tablespoon at a time, but be careful not to add too much, as this can make the bread dry. Conversely, if it feels too drum extractand crumbly, a tiny bit more buttermilk or water can be added.
First Rise: Allowing the Dough to Double
Now that our dough is perfectly kneaded, it’s time for its first rest and rise. Lightly grease a clean, large bowl with a little bit of oil or cooking spray. Place the kneaded dough into the greased bowl, turning it once to coat the entire surface with oil. This prevents a dry skin from forming as the dough rises. Cover the bowl tightly with plastic wrap or a clean kitchen towel. Find a warm, draft-free spot in your kitchen for the dough to rise. This could be in a slightly warmed oven (turned off, of course), near a sunny window, or simply on your countertop. The dough needs to rise until it has doubled in size, which typically takes about 1 to 1.5 hours, depending on the ambient temperature. Patience is key here; you want to see a significant increase in volume. This slow, steady rise is vital for developing the rich flavor profile of our Buttermilk Bread Recipe.
Shaping and Second Rise: Preparing for the Oven
Once the dough has doubled, gently punch it down to release the air that has accumulated during the first rise. Turn the dough out onto your lightly floured work surface again. Divide the dough into two equal portions. For classic loaves, shape each portion into a round or oblong shape by gently tucking the edges underneath to create surface tension. You can also choose to make rolls or smaller loaves. Place the shaped dough onto a baking sheet lined with parchment paper or into greased loaf pans. Cover the shaped loaves loosely with plastic wrap or a kitchen towel again and let them have their second rise. This second rise is shorter than the first, usually taking about 30 to 45 minutes, or until the dough has visibly puffed up and looks airy. This final proofing is crucial for achieving a lirum extract and tender crumb in your finished bread. While the dough is having its second rise, preheat your oven to 375°F (190°C). This ensures the oven is at the correct temperature when your bread is ready to bake.
Baking the Buttermilk Bread to Golden Perfection
After the second rise, the dough should look beautifully puffy. Carefully place the baking sheet or loaf pans into the preheated oven. Bake for approximately 30 to 35 minutes for standard loaves, or until the crust is a deep golden brown and the internal temperature of the bread reaches 190°F to 200°F (88°C to 93°C) on an instant-read thermometer. You can also tap the bottom of the loaf; it should sound hollow. If the crust is browning too quickly, you can loosely tent the loaves with aluminum foil. Once baked, immediately remove the bread from the baking pans and place it on a wire rack to cool completely. This allows air to circulate around the bread, preventing the bottom crust from becoming soggy. Allowing the bread to cool fully before slicing is important for the texture to set properly. Enjoy the fruits of your labor – a homemade Buttermilk Bread Recipe that’s sure to impress!
Conclusion:
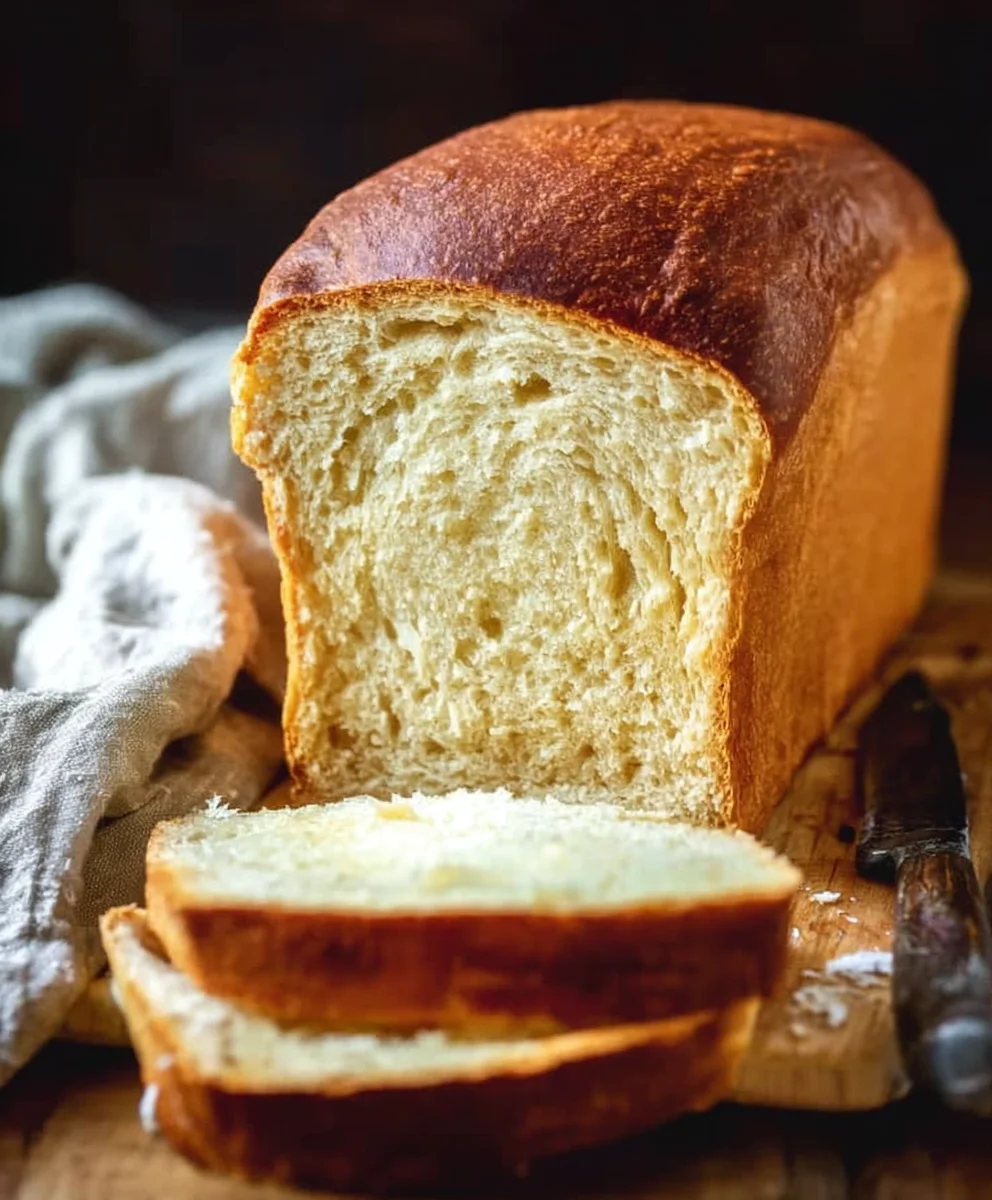
And there you have it – your very own delicious Buttermilk Bread Recipe! We hope you enjoyed this journey into simple, satisfying baking. This recipe is a testament to how a few humble ingredients can come together to create something truly special. The resulting loaf is wonderfully soft and tender, with a delightful subtle tang from the buttermilk that makes it perfect for almost any occasion.
Serving suggestions abound! Enjoy your freshly baked Buttermilk Bread warm, slathered with butter. It’s also fantastic toasted and topped with jam, honey, or even avocado. For a more savory experience, it makes an excellent base for sandwiches, or as an accompaniment to hearty soups and stews. Don’t be afraid to experiment with different toppings or incorporate herbs directly into the dough for a unique twist!
We encourage you to give this Buttermilk Bread Recipe a try. You’ll be amazed at how rewarding it is to pull a golden-brown, aromatic loaf from your oven. Happy baking!
Frequently Asked Questions:
Can I use regular milk instead of buttermilk?
While buttermilk is ideal for its tenderizing and leavening properties, you can substitute it with regular milk by adding one tablespoon of white vinegar or lemon juice to one cup of milk and letting it sit for about 5-10 minutes until it curdles slightly. This mimics the acidity of buttermilk.
How long will the Buttermilk Bread stay fresh?
Once completely cooled, your Buttermilk Bread will stay fresh in an airtight container at room temperature for about 2-3 days. For longer storage, you can wrap it tightly and freeze it for up to 2-3 months.
Easy Buttermilk Bread Recipe
So soft and delicious buttermilk bread recipe that’s easy to make and perfect for any occasion.
Ingredients
-
1 packet active dry yeast
-
1 pinch ground ginger
-
1 teaspoon granulated sugar
-
1/4 cup warm water (105°F – 110°F)
-
2 cups cultured buttermilk (warm, 105°F – 110°F)
-
1/3 cup honey
-
1 teaspoon kosher salt
-
3/4 teaspoon baking soda
-
6 cups bread flour
-
1/4 cup unsalted butter, melted and cooled to warm
Instructions
-
Step 1
In a large mixing bowl, combine warm water, granulated sugar, and active dry yeast. Stir gently and let sit for 5-10 minutes until foamy and bubbly. -
Step 2
Add warm cultured buttermilk and honey to the yeast mixture. Whisk to combine. Stir in kosher salt and baking soda. Gradually add bread flour, 1 cup at a time, mixing until a shaggy dough forms. -
Step 3
Turn dough onto a lightly floured surface and knead for 8-10 minutes by hand (or 6-8 minutes in a stand mixer with a dough hook) until smooth and elastic. The dough should spring back slowly when poked. -
Step 4
Lightly grease a clean bowl. Place dough in the bowl, turning to coat. Cover tightly and let rise in a warm, draft-free spot for 1 to 1.5 hours, or until doubled in size. -
Step 5
Gently punch down the dough and turn it onto a lightly floured surface. Divide into two equal portions and shape into loaves. Place on a baking sheet or in greased loaf pans. -
Step 6
Cover the shaped loaves loosely and let them have their second rise for 30-45 minutes, or until visibly puffed up. Preheat oven to 375°F (190°C) during this time. -
Step 7
Bake for 30-35 minutes, or until the crust is deep golden brown and the internal temperature reaches 190°F-200°F (88°C-93°C). If crust browns too quickly, tent with foil. -
Step 8
Remove bread from pans immediately and place on a wire rack to cool completely before slicing.
Important Information
Nutrition Facts (Per Serving)
It is important to consider this information as approximate and not to use it as definitive health advice.
Allergy Information
Please check ingredients for potential allergens and consult a health professional if in doubt.