Strawberry Swirl Cheesecake Cookie Cups-Easy Recipe
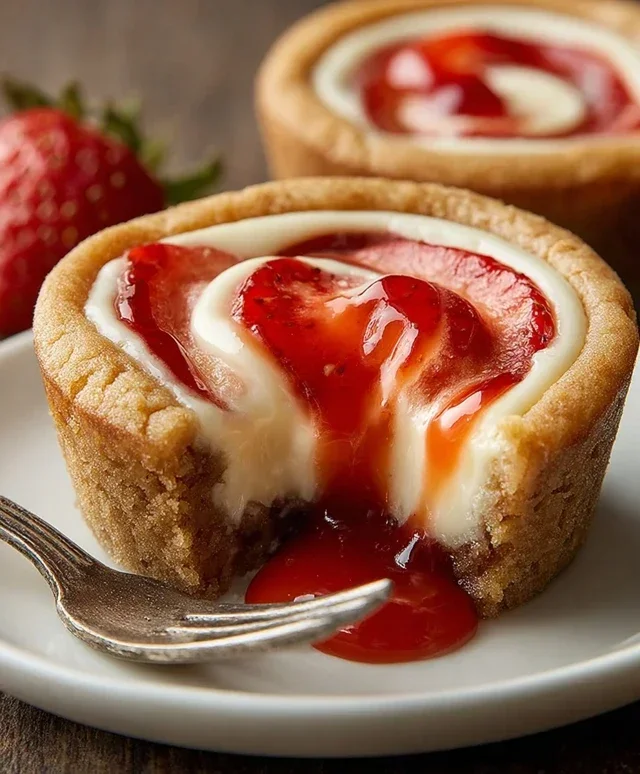
Strawberry Swirl Cheesecake Cookie Cups are a delightful fusion of two beloved desserts, and let me tell you, they are an absolute game-changer! Imagin extracte sinking your teeth into a perfectly chewy cookie base, cradling a creamy, tangy cheesecake filling, all swirled with vibrant ribbons of sweet strawberry goodness. It’s no wonder these Strawberry Swirl Cheesecake Cookie Cups have become such a sensation. They offer the comforting familiarity of a classic cookie while elevating it with the sophisticated indulgence of cheesecake. What truly makes these special is the masterful balance of textures and flavors – the slight crispness of the cookie rim giving way to the luscious cheesecake center, punctuated by bursts of fresh strawberry. They’re individual portions of pure joy, perfect for parties, a special treat, or just because you deserve something extraordinary. Get ready to fall in love with this innovative treat!
Strawberry Swirl Cheesecake Cookie Cups
Get ready to impress your taste buds and your guests with these delightful Strawberry Swirl Cheesecake Cookie Cups! Imagin extracte the perfect marriage of a soft, chewy sugar cookie base and a rich, creamy cheesecake filling, all swirled with vibrant strawberry goodness. These little bites of heaven are surprisingly easy to make and are guaranteed to be a showstopper at any gathering, or simply a treat for yourself. They’re like a mini cheesecake met a delightful cookie and decided to have a delicious party. I love how portable they are, making them perfect for picnics, potlucks, or just enjoying with a cup of coffee. The combination of textures and flavors is simply irresistible.
Ingredients:
Getting Started: Preparing the Cookie Cups
The first step in creating these incredible treats is to prepare our cookie cup bases. Preheat your oven to 350 degrees Fahrenheit (175 degrees Celsius). This temperature is ideal for ensuring the cookies bake evenly without becoming too crisp. While the oven heats up, grab a mini muffin tin. You’ll want to lightly grease it with cooking spray or butter. This is a crucial step to prevent the cookies from sticking, which can be a real disappointment when you’re trying to get them out perfectly formed.
Now, open your roll of refrigerated sugar cookie dough. If you’re using homemade dough, make sure it’s chilled and ready to be portioned. Take small portions of the cookie dough, about the size of a large marble, and press them into the bottom and up the sides of each muffin cup. You’re essentially creating a little edible bowl for our cheesecake filling. I like to use my fingers to gently press the dough, but a small tart tamper or even the bottom of a small glass can also work wonderfully. Ensure you have an even layer of dough all around so the cups bake uniformly. Don’t worry if they don’t look perfectly uniform; the imperfections often add to their homemade charm!
Crafting the Creamy Cheesecake Filling
While the cookie dough is chilling slightly in the muffin tin (a few minutes in the fridge can help them hold their shape better), it’s time to whip up the luxurious cheesecake filling. In a medium bowl, combine the softened cream cheese and granulated sugar. It’s really important that your cream cheese is softened; this will make it much easier to mix into a smooth, lump-free consistency. If it’s too cold, you’ll end up with small pockets of cream cheese, and nobody wants that in their cheesecake! Use an electric mixer (handheld or stand mixer) to beat the cream cheese and sugar together until they are light and fluffy. This process incorporates air, which gives the filling a lovely texture.
Next, add the vanilla extract to the cream cheese mixture. Vanilla is a classic flavor enhancer for cheesecake, bringin extractg out the richness of the cream cheese and adding a wonderful aroma. Beat again until the vanilla extract is fully incorporated. You want this mixture to be smooth and creamy, like a silky cloud. Take your time with this step; a well-mixed filling is key to the overall success of these cookie cups.
Assembling and Swirling the Magic
Now for the fun part: assembling and creating that beautiful strawberry swirl! Once the cookie cups have had a chance to chill briefly, carefully spoon the cheesecake filling into each one. Don’t overfill them; you want to leave a little space at the top for the strawberry jam. About one to two tablespoons of filling per cookie cup is usually a good amount, depending on the size of your muffin tin and how thick you made your cookie cup walls.
Next, it’s time to add the star of the swirl: the strawberry jam. Warm your strawberry jam slightly. This can be done by microwaving it for about 15-20 seconds or gently heating it on the stovetop. Warming the jam makes it runnier and easier to drizzle, creating those gorgeous swirls. Using a small spoon or a piping bag (if you’re feeling fancy), drizzle the warmed strawberry jam over the cheesecake filling in each cookie cup. Once you’ve drizzled the jam, take a toothpick or a small skewer and gently swirl the jam into the cheesecake filling. Don’t over-swirl, or you’ll lose the distinct stripes. A few gentle figure-eights or circular motions will create a beautiful marbled effect.
Baking and Finishing Touches
With your cookie cups assembled and swirled, it’s time to bake them. Carefully place the filled muffin tin into your preheated oven. Bake for approximately 18-22 minutes, or until the edges of the cookie cups are golden brown and the cheesecake filling is set. You’ll know they’re done when the filling looks firm and not jiggly in the center. Be mindful that oven temperatures can vary, so keep an eye on them during the last few minutes of baking. Overbaking can make the cookie part too hard.
Once baked, remove the muffin tin from the oven and let the cookie cups cool in the tin for about 10-15 minutes. This allows them to firm up further. After this initial cooling period, carefully run a knife or a small offset spatula around the edges of each cookie cup to loosen them, then gently transfer them to a wire rack to cool completely. This is the hardest part – waiting for them to cool! Once they are completely cooled, you can add your optional garnishes. A fresh strawberry slice or a sprinkle of chocolate shavings adds a beautiful visual appeal and an extra burst of flavor. These Strawberry Swirl Cheesecake Cookie Cups are best enjoyed at room temperature or slightly chilled. Enjoy every single delicious bite!
Conclusion:
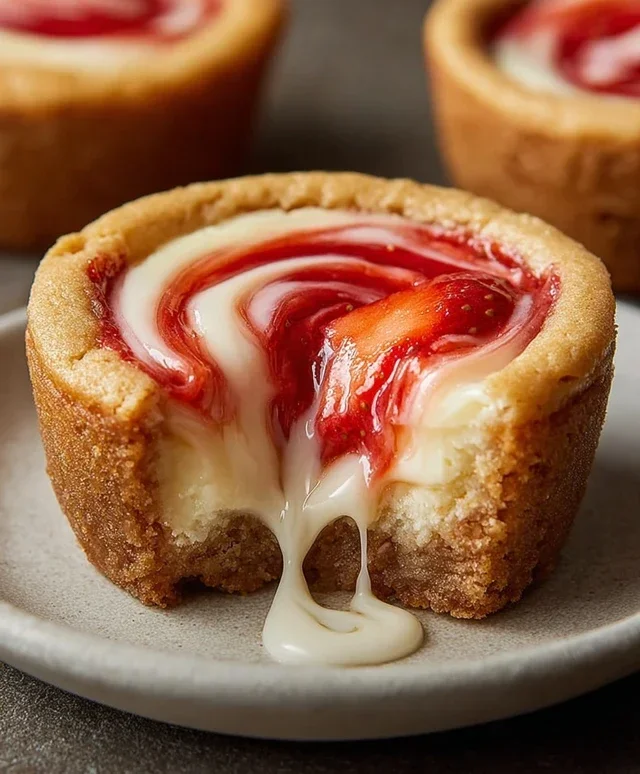
There you have it – the ultimate guide to creating these irresistible Strawberry Swirl Cheesecake Cookie Cups! These delightful treats are a testament to simplicity and flavor, offering a perfect balance of buttery cookie crust and creamy, tangy cheesecake filling, all elevated by that gorgeous strawberry swirl. They’re incredibly versatile, making them ideal for any occasion, from a casual afternoon snack to a show-stopping dessert for a party. I truly believe everyone should give these Strawberry Swirl Cheesecake Cookie Cups a try; they are surprisingly easy to make and the payoff in taste and presentation is immense!
For serving, I love presenting them chilled, perhaps with a fresh strawberry or a dollop of whipped cream on top. They also pair wonderfully with a light, fruity iced tea or a classic iced coffee. Don’t be afraid to experiment with variations! You could swap the strawberry for raspberry or blueberry puree for a different fruity kick, or even try a chocolate drizzle for a decadent twist. The possibilities are endless, and I encourage you to make these your own.
FAQs:
Can I make the cookie dough ahead of time?
Absolutely! You can prepare the cookie dough and chill it in the refrigerator for up to 3 days. This actually can enhance the flavor and texture of the cookies. Just bring it to room temperature for a few minutes before pressing it into your muffin tin.
How do I prevent the cheesecake filling from cracking?
While these are cookie cups and the filling is more forgiving, a common cheesecake tip is to avoid over-baking. Bake just until the edges are set and the center is still slightly wobbly. As they cool, the center will firm up. Also, ensure your oven temperature is accurate.
What’s the best way to store leftover Strawberry Swirl Cheesecake Cookie Cups?
Store any leftover cookie cups in an airtight container in the refrigerator. They will keep well for about 3-4 days. I find they are delicious cold or brought back to room temperature for about 15-20 minutes before enjoying.
Strawberry Swirl Cheesecake Cookie Cups
Delightful cookie cups with a creamy cheesecake filling swirled with sweet strawberry jam, baked in a buttery sugar cookie base.
Ingredients
-
1 roll (16.5 oz) refrigerated sugar cookie dough or homemade equivalent
-
8 oz cream cheese, softened
-
1/4 cup granulated sugar
-
1 tsp vanilla extract
-
1/3 cup strawberry jam, warmed slightly
-
Fresh strawberries (optional)
-
Chocolate shavings (optional)
Instructions
-
Step 1
Preheat oven to 350°F (175°C). Grease a 12-cup muffin tin. -
Step 2
Press sugar cookie dough evenly into the bottom and up the sides of each muffin cup. -
Step 3
In a medium bowl, beat together cream cheese and granulated sugar until smooth. Stir in vanilla extract. -
Step 4
Spoon about 1 tablespoon of the cream cheese mixture into each cookie cup. -
Step 5
Drizzle about 1 teaspoon of warmed strawberry jam over the cream cheese filling in each cup. -
Step 6
Use a toothpick or skewer to gently swirl the jam into the cream cheese. -
Step 7
Bake for 15-18 minutes, or until cookie edges are golden brown and filling is set. -
Step 8
Let cool in the muffin tin for 10 minutes before transferring to a wire rack to cool completely. Garnish with fresh strawberries or chocolate shavings if desired.
Important Information
Nutrition Facts (Per Serving)
It is important to consider this information as approximate and not to use it as definitive health advice.
Allergy Information
Please check ingredients for potential allergens and consult a health professional if in doubt.