Garlic Herb Chickpea Flour Snack Crackers
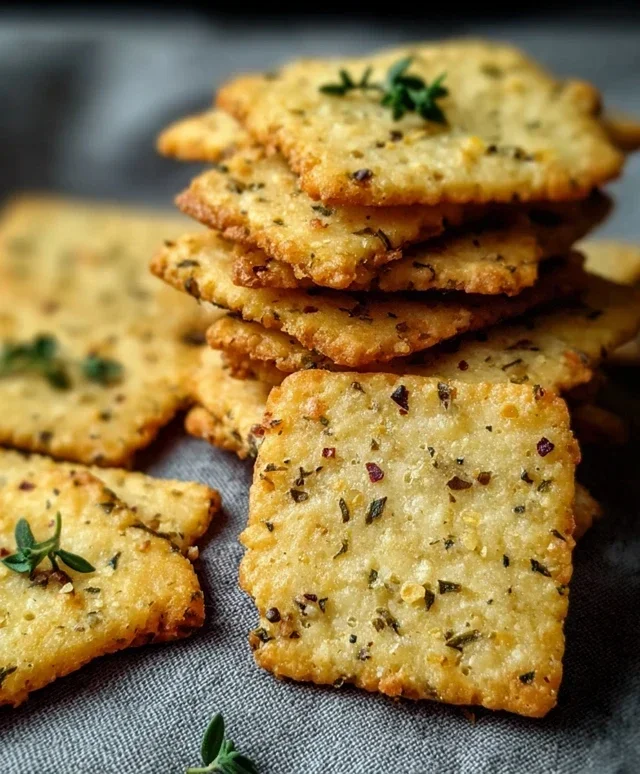
Garlic and Herb Chickpea Flour Snack Crackerss are about to become your new obsession! Forget those bland store-bought options; we’re talking about a flavor explosion in every bite, made right in your own kitchen. I absolutely adore these little flavor bombs because they’re not only incredibly delicious but also surprisingly healthy and versatile. They’re perfect for guilt-free snacking, pairing beautifully with your favorite dips, or even as a delightful base for mini appetizers. What truly sets these Garlic and Herb Chickpea Flour Snack Crackerss apart is the irresistible aroma that fills your home as they bake, and the satisfying crunch that follows. They’re naturally gluten-free, packed with plant-based protein from the chickpea flour, and bursting with the aromatic punch of garlic and a medley of fresh herbs. Prepare to impress yourself and anyone lucky enough to share these with you!
Ingredients:
Garlic and Herb Chickpea Flour Snack Crackers
Are you looking for a simple, delicious, and surprisingly healthy snack? Something you can whip up with pantry staples and customize to your heart’s content? Then you’ve come to the right place! These Garlic and Herb Chickpea Flour Snack Crackers are a game-changer. Forget those store-bought options laden with who-knows-what; we’re making our own incredibly flavorful and satisfying crackers right in our own kitchens.
Chickpea flour, also known as besan, is the star of this recipe. It’s not only gluten-free but also packed with protein and fiber, making these crackers a fantastic option for a light lunch, a satisfying snack, or even as a base for your favorite dips and spreads. The combination of fragrant garlic powder and aromatic mixed herbs infuses every bite with a wonderful savory depth, while a touch of olive oil provides a lovely richness and crispness when baked. This recipe is so straightforward that even novice bakers will find success, and the flexibility it offers means you can experiment with different herbs and spices to create your own signature cracker.
Crafting Your Flavorful Dough
The foundation of these crackers is a simple batter that comes together in mere minutes. You’ll start by combining your dry ingredients in a medium-sized bowl. This includes the chickpea flour, which provides that distinctive nutty flavor and slightly crum extractbly texture. To this, you’ll add the garlic powder, a key player in delivering that punchy garlicky goodness. Don’t be shy with the garlic powder; it’s what truly elevates these crackers from bland to brilliant. We’ll also incorporate the dried mixed herbs. Feel free to use your favorite blend or even pick out individual herbs like rosemary, thyme, or oregano that you particularly enjoy. The salt and black pepper are essential for balancing the flavors and adding a gentle warmth. Give these dry ingredients a good whisk together to ensure everything is evenly distributed. This prevents pockets of flavor and ensures consistency throughout your cracker batter.
Next, it’s time to introduce the wet ingredients. Pour in the water and the olive oil. The olive oil is crucial not only for binding the ingredients but also for contributing to the texture of the final cracker. It helps to create that desirable crispness and prevents them from being too dry or brittle. Use a whisk or a fork to vigorously mix everything together. You’re aiming for a smooth, thick batter, almost like a pancake batter but a little thicker. It shouldn’t be too runny, as this can lead to spread-out, uneven crackers. If it seems a touch too thick, you can add another tablespoon of water, a teaspoon at a time, until you reach the desired consistency. Conversely, if it’s too thin, a tiny sprinkle more of chickpea flour can help.
Shaping and Baking to Perfection
Once your batter is ready, it’s time to prepare for baking. Preheat your oven to 375°F (190°C). This moderate temperature is ideal for baking crackers, allowing them to crisp up without burning. While the oven heats, line a large baking sheet with parchment paper. Parchment paper is your best friend here, as it prevents sticking and makes cleanup a breeze.
Now, for the shaping. Pour your chickpea flour batter onto the prepared baking sheet. Using a spatula or the back of a spoon, spread the batter out as thinly and evenly as possible. The thinner you spread it, the crispier your crackers will be. Aim for a uniform thickness across the entire sheet. You want them to be thin enough to bake through quickly and achieve that satisfying crunch, but not so thin that they become fragile and impossible to handle. Think of it like spreading frosting on a cake, but with a thicker batter. If you have a rolling pin that you don’t mind getting a little messy, you can even lightly roll the dough out once it’s spread.
Adding Your Finishing Touches and Baking
Before they go into the oven, this is where we add those extra touches that make these crackers truly special. Lightly brush the surface of the spread batter with a little extra olive oil. This will help them to brown beautifully and add another layer of flavor and crispness. Now, generously sprinkle the top with sesame seeds. These little seeds not only add a lovely nutty crunch but also look fantastic. For an extra burst of flavor and visual appeal, sprinkle some additional dried herbs over the top as well. Finally, a light dusting of flaky sea salt will provide those delightful little pops of saltiness that enhance all the other flavors.
Place the baking sheet in the preheated oven and bake for 18 to 25 minutes. The exact baking time will depend on the thickness of your batter and your oven. Keep a close eye on them, especially in the last 10 minutes. You’re looking for them to be golden brown around the edges and firm to the touch. They should feel dry and crisp. If some areas are browning faster than others, you can gently rotate the baking sheet halfway through the baking time.
Cooling and Enjoying Your Homemade Delights
Once baked to perfection, carefully remove the baking sheet from the oven. Allow the crackers to cool on the baking sheet for a few minutes. They will continue to crisp up as they cool. While they are still warm, use a pizza cutter or a sharp knife to score them into desired cracker shapes. You can make squares, rectangles, or even triangles – whatever you fancy! If you didn’t score them before they cooled completely, don’t worry. You can also break them apart by hand once they are fully cooled.
After scoring, transfer the crackers to a wire rack to cool completely. This is a crucial step to ensure they become truly crisp and not at all chewy. Once they are completely cool, they are ready to be enjoyed! Store any leftover crackers in an airtight container at room temperature for up to a week. They are perfect for dipping into hummus, guacamole, or your favorite salsa, or simply enjoying on their own as a satisfying and healthy snack. Enjoy your delicious, homemade Garlic and Herb Chickpea Flour Snack Crackers!
Conclusion:
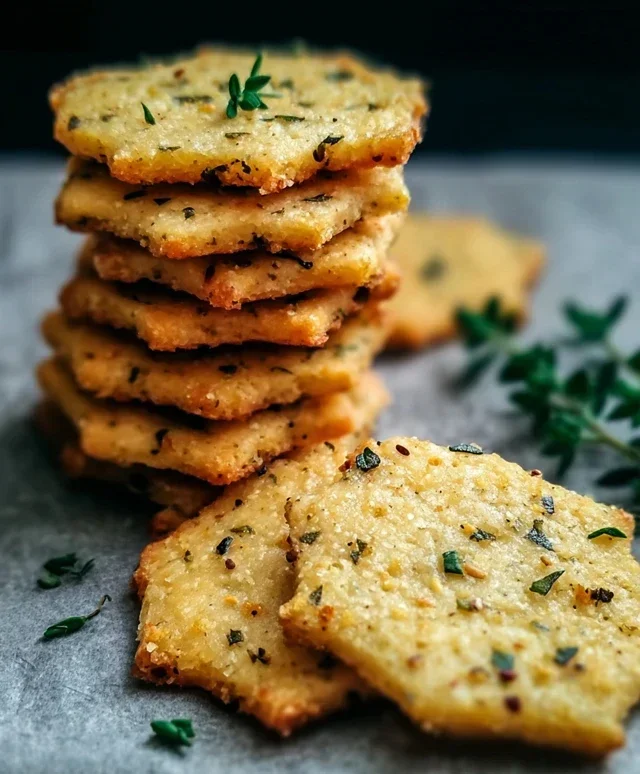
These Garlic and Herb Chickpea Flour Snack Crackers are an absolute winner! They are wonderfully crispy, packed with savory flavor, and incredibly satisfying. The best part? They’re naturally gluten-free and vegan, making them a fantastic option for so many dietary needs and preferences. The simplicity of the ingredients and the straightforward preparation means you can whip up a batch of these delightful crackers with minimal fuss, perfect for a last-minute snack attack or a healthy addition to your charcuterie board. I truly encourage you to give these Garlic and Herb Chickpea Flour Snack Crackers a try; you won’t be disappointed!
Serving these is a breeze. They are delicious on their own, but I love pairing them with creamy hummus, a sharp cheddar cheese, or a fresh avocado dip. For a more substantial bite, try topping them with smoked salmon and a dollop of crème fraîche. If you’re feeling adventurous, experiment with different herbs like rosemary or thyme, or add a pinch of chili flakes for a spicy kick. You can even incorporate seeds like sesame or poppy into the dough for added texture and flavor.
Frequently Asked Questions:
How can I ensure my crackers are extra crispy?
To achieve maximum crispiness, ensure your dough is rolled very thinly and consistently. Baking on parchment paper also helps prevent sticking and promotes even crisping. Don’t overcrowd the baking sheet, allowing air to circulate around each cracker. If they aren’t as crisp as you’d like after the initial bake, you can return them to the oven at a lower temperature for a few extra minutes, keeping a close eye on them to prevent burning.
Can I store these crackers for later?
Absolutely! Once completely cooled, store your Garlic and Herb Chickpea Flour Snack Crackers in an airtight container at room temperature. They should stay fresh and delightfully crunchy for up to a week. If humidity is a concern in your area, you might find they lose a little crispness over time, but a quick revival in a low oven usually does the trick.
What other flours can I use instead of chickpea flour?
While chickpea flour provides a unique texture and nutty flavor, you can experiment with other gluten-free flour blends. A mix of brown rice flour and almond flour could work, or even a dedicated gluten-free all-purpose blend. However, be aware that the texture and baking time might vary, so some adjustments may be necessary.
Garlic and Herb Chickpea Flour Snack Crackers
Crispy and flavorful homemade crackers made with chickpea flour, garlic, and herbs. Perfect for dipping or enjoying on their own.
Ingredients
-
1 cup chickpea flour (besan)
-
½ cup water
-
2 tablespoons olive oil
-
1 teaspoon dried mixed herbs (such as rosemary, thyme, oregano)
-
1 teaspoon garlic powder
-
½ teaspoon salt
-
¼ teaspoon black pepper
-
Sesame seeds
-
Flaky sea salt
-
Additional dried herbs
-
Extra olive oil for brushing
Instructions
-
Step 1
In a medium bowl, whisk together the chickpea flour, dried mixed herbs, garlic powder, salt, and black pepper. -
Step 2
Gradually add the water and olive oil to the dry ingredients, mixing until a smooth, thick batter forms. It should be pourable but not watery. -
Step 3
Preheat your oven to 350°F (175°C). Line a baking sheet with parchment paper. -
Step 4
Pour the batter onto the prepared baking sheet and spread it thinly and evenly using a spatula or offset spatula. Aim for a uniform thickness for even baking. -
Step 5
Sprinkle the surface with sesame seeds, flaky sea salt, and additional dried herbs, if desired. -
Step 6
Bake for 15-20 minutes, or until the edges are golden brown and the crackers are crisp. Keep an eye on them as they can brown quickly. -
Step 7
Once baked, remove from the oven and let cool completely on the baking sheet before breaking or cutting into cracker shapes. Brush lightly with extra olive oil if desired for extra crispness.
Important Information
Nutrition Facts (Per Serving)
It is important to consider this information as approximate and not to use it as definitive health advice.
Allergy Information
Please check ingredients for potential allergens and consult a health professional if in doubt.