Easy Pineapple Upside Down Cupcakes – Quick Recipe
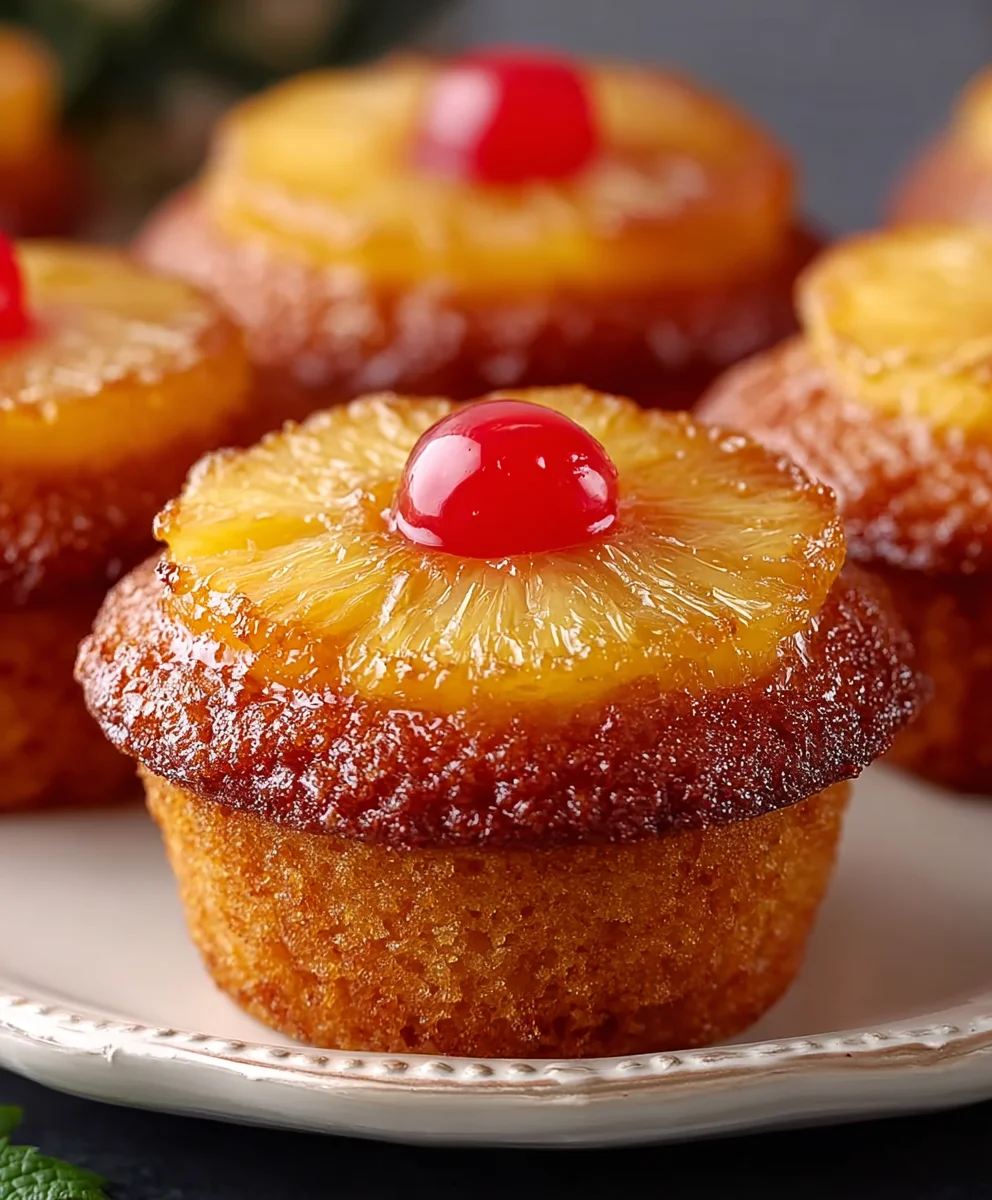
Easy Pineapple Upside Down Cupcakes are a delightful twist on a classic dessert, and I’m thrilled to share a recipe that’s both incredibly simple and wonderfully delicious. Imagin extracte the bright, tangy sweetness of caramelized pineapple meeting a tender, moist cake base, all bundled into individual, perfectly portioned treats. What’s not to love about that? This dessert consistently wins hearts because it captures that comforting, nostalgic flavor profile we all adore, but with an added layer of convenience. The magic of these easy pineapple upside down cupcakes lies in their ability to deliver that unmistakable taste of the tropics with minimal fuss. We’re talking about a recipe that’s perfect for a weeknight treat, a charming addition to a potluck, or even a fun baking project with the kids. Get ready to impress yourself and your loved ones with these stunning and utterly satisfying easy pineapple upside down cupcakes.
Ingredients:
- 1/4 cup unsalted butter, melted
- 1/2 cup packed brown sugar
- 12 pineapple rings from a can, drained (reserve the juice for another use if desired)
- 12 maraschino cherries, drained
- 1 1/3 cups all-purpose flour
- 1 cup granulated sugar
- 1/3 cup unsalted butter, softened
- 2/3 cup milk
- 1/4 cup vegetable oil
- 1 1/2 teaspoons baking powder
- 1/2 teaspoon pure vanilla extract
- 2 large eggs
- 1/4 teaspoon salt
Preparing the Topping
Step 1: Creating the Caramelized Base
Let’s start by getting that beautiful, sweet topping ready. Preheat your oven to 350°F (175°C). Grab a standard 12-cup muffin tin and line each cup with a paper liner. This will make cleanup a breeze! Now, in a small bowl, combine the 1/4 cup of melted unsalted butter with the 1/2 cup of packed brown sugar. Stir this mixture until it’s smooth and well combined. This is going to form the delicious, syrupy base for our pineapple upside down cupcakes.
Step 2: Assembling the Pineapple and Cherry Layers
This is where the “upside down” magic begin extracts! Spoon about one teaspoon of the brown sugar butter mixture into the bottom of each prepared muffin liner. It doesn’t need to be perfectly spread; it will melt and spread on its own during baking. Next, we’ll add the star of the show – the pineapple rings. Carefully place one drained pineapple ring into the bottom of each muffin cup, on top of the brown sugar mixture. Try to center them as much as possible. Now, for that pop of color and extra sweetness, place one maraschino cherry right in the center of each pineapple ring. Ensure the cherries are drained well to avoid excess liquid.
Making the Cupcake Batter
Step 3: Creaming the Butter and Sugar
Now it’s time to make the cupcake batter! In a large mixing bowl, cream together the 1/3 cup of softened unsalted butter and the 1 cup of granulated sugar. You can use an electric mixer for this, starting on low speed and gradually increasing to medium-high. Beat them together until the mixture is light and fluffy, which usually takes about 2-3 minutes. This process incorporates air, which helps create a tender crum extractb in your cupcakes. Don’t rush this step; it’s crucial for a good texture.
Step 4: Incorporating Wet Ingredients
Once your butter and sugar are nicely creamed, it’s time to add the eggs and vanilla extract. Add the 2 large eggs, one at a time, beating well after each addition until fully incorporated. Scrape down the sides of the bowl occasionally to ensure everything is evenly mixed. Then, stir in the 1/2 teaspoon of vanilla extract. In a separate, smaller bowl or a liquid measuring cup, whisk together the 2/3 cup of milk and the 1/4 cup of vegetable oil. This combination of milk and oil will contribute to a moist and tender cupcake.
Combining and Baking
Step 5: Alternating Dry and Wet Ingredients
In a separate medium bowl, whisk together the 1 1/3 cups of all-purpose flour, 1 1/2 teaspoons of baking powder, and 1/4 teaspoon of salt. Whisking these dry ingredients together ensures that the leavening agent (baking powder) and salt are evenly distributed throughout the flour, leading to a consistent rise and flavor in your cupcakes. Now, we’ll alternate adding the dry ingredients and the milk/oil mixture to the creamed butter and sugar mixture. Add about one-third of the dry ingredients to the butter mixture and mix on low speed until just combined. Then, add half of the milk and oil mixture and mix until just combined. Repeat this process, adding another third of the dry ingredients, then the remaining milk and oil, and finally, the last third of the dry ingredients. Be careful not to overmix the batter at this stage. Overmixing can develop the gluten in the flour too much, resulting in tough cupcakes. Mix only until no streaks of flour remain.
Step 6: Filling the Muffin Cups and Baking
Now that your batter is ready, carefully spoon it into the prepared muffin liners, filling each one about two-thirds of the way full. The batter will rise during baking, so you don’t want to overfill them. Gently tap the muffin tin on the counter a couple of times to help level the batter and release any large air bubbles. Place the muffin tin in your preheated oven. Bake for 18-22 minutes, or until a toothpick inserted into the center of a cupcake comes out clean. The baking time can vary slightly depending on your oven, so keep an eye on them.
Step 7: Cooling and Unmolding
Once the cupcakes are baked, remove the muffin tin from the oven. Let them cool in the tin for about 5-10 minutes. This brief cooling period allows the cupcakes to set up slightly, making them easier to unmold without breaking. After this initial cooling, carefully invert the muffin tin onto a wire rack or a clean plate. The cupcakes should slide out easily, revealing the beautiful caramelized pineapple and cherry topping. If any of the topping sticks to the liner, you can gently scrape it off and place it back on top of the cupcake. Allow the cupcakes to cool completely on the wire rack before serving to let the flavors meld and the topping firm up.
Conclusion:
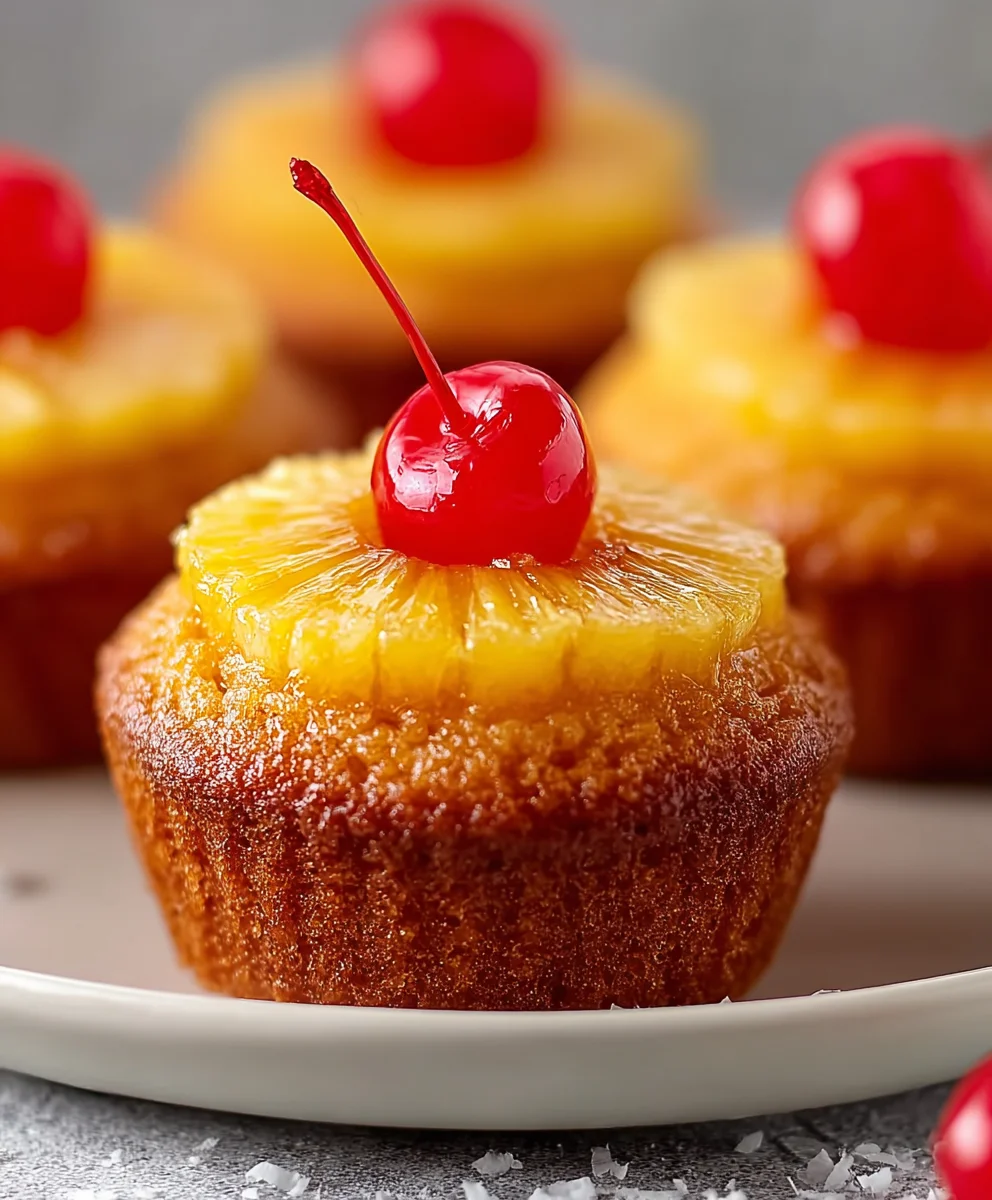
And there you have it – your very own batch of delicious Easy Pineapple Upside Down Cupcakes! This recipe is a fantastic way to enjoy the classic flavors of a pineapple upside down cake in a perfectly portioned, portable, and undeniably adorable cupcake form. The combination of sweet, caramelized pineapple, moist cake, and a hint of brown sugar is truly irresistible. I hope you have as much fun making and devouring these as I do!
These Easy Pineapple Upside Down Cupcakes are wonderful on their own, but they also shine when served with a dollop of whipped cream or a scoop of vanilla bean ice cream. For a more decadent treat, consider a drizzle of salted caramel sauce. If you’re feeling adventurous, try swapping out the pineapple for sliced peaches or cherries for a delightful variation. Don’t be afraid to experiment and make these cupcakes your own!
Frequently Asked Questions:
Can I make the topping ahead of time?
Yes, you can prepare the caramelized pineapple topping a day in advance. Store it in an airtight container in the refrigerator. Gently warm it before spooning it into your cupcake liners to ensure it’s spreadable.
How do I prevent the topping from sticking to the liners?
Ensuring you grease and flour your cupcake liners generously, or using non-stick liners, is key. Also, allowing the cupcakes to cool in the pan for about 10-15 minutes before attempting to remove them can help the caramel solidify slightly, making it easier to release.
Can I use fresh pineapple instead of canned?
Absolutely! If using fresh pineapple, make sure to drain it very well after slicing and pat it dry with paper towels to remove excess moisture. You might also need to adjust the cooking time for the topping slightly as fresh pineapple can contain more water.
Easy Pineapple Upside Down Cupcakes – Quick Recipe
Delicious and easy pineapple upside down cupcakes with a sweet caramelized topping.
Ingredients
-
1/4 cup unsalted butter, melted
-
1/2 cup packed brown sugar
-
12 pineapple rings from a can, drained
-
12 maraschino cherries, drained
-
1 1/3 cups all-purpose flour
-
1 cup granulated sugar
-
1/3 cup unsalted butter, softened
-
2/3 cup milk
-
1/4 cup vegetable oil
-
1 1/2 teaspoons baking powder
-
1/2 teaspoon pure vanilla extract
-
2 large eggs
-
1/4 teaspoon salt
Instructions
-
Step 1
Preheat oven to 350°F (175°C). Line a 12-cup muffin tin with paper liners. Combine 1/4 cup melted butter and 1/2 cup brown sugar in a small bowl until smooth. Spoon about one teaspoon of this mixture into the bottom of each muffin liner. -
Step 2
Place one drained pineapple ring into the bottom of each muffin cup on top of the brown sugar mixture. Place one drained maraschino cherry in the center of each pineapple ring. -
Step 3
In a large mixing bowl, cream together 1/3 cup softened butter and 1 cup granulated sugar until light and fluffy. Add 2 large eggs, one at a time, beating well after each addition. Stir in 1/2 teaspoon vanilla extract. In a separate bowl, whisk together 2/3 cup milk and 1/4 cup vegetable oil. -
Step 4
In a medium bowl, whisk together 1 1/3 cups all-purpose flour, 1 1/2 teaspoons baking powder, and 1/4 teaspoon salt. Alternately add about one-third of the dry ingredients, then half of the milk/oil mixture, to the creamed butter and sugar mixture. Repeat with another third of the dry ingredients, the remaining milk and oil, and finally the last third of the dry ingredients. Mix on low speed until just combined, being careful not to overmix. -
Step 5
Spoon the batter into the prepared muffin liners, filling each about two-thirds full. Tap the muffin tin gently to level the batter. Bake for 18-22 minutes, or until a toothpick inserted into the center comes out clean. -
Step 6
Let the cupcakes cool in the tin for 5-10 minutes. Carefully invert the muffin tin onto a wire rack or clean plate to unmold the cupcakes. Allow to cool completely on the wire rack before serving.
Important Information
Nutrition Facts (Per Serving)
It is important to consider this information as approximate and not to use it as definitive health advice.
Allergy Information
Please check ingredients for potential allergens and consult a health professional if in doubt.