Easy No-Bake Peanut Butter Cheesecake Balls Recipe
No-Bake Peanut Butter Cheesecake Balls are about to become your new obsession! Are you craving something decadent, creamy, and utterly delicious, but dreading the oven on a warm day? Then these little bites of heaven are your answer. We all love cheesecake, right? That smooth, rich texture and sweet, tangy flavor are hard to beat. But when you combine that with the irresistible allure of creamy peanut butter, well, that’s a match made in dessert paradise. What makes these No-Bake Peanut Butter Cheesecake Balls so special is their deceptive simplicity. They require no baking whatsoever, making them incredibly accessible for bakers of all skill levels. Plus, the portable nature means you can pop them in your mouth for an instant mood boost or share them at your next gathering – though I wouldn’t blame you if you kept them all to yourself!
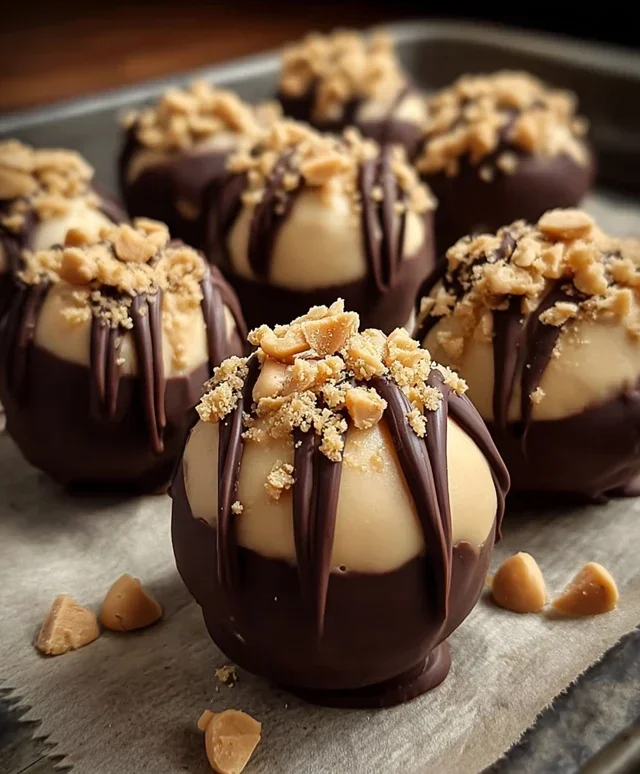
No-Bake Peanut Butter Cheesecake Balls
Get ready for a delightful treat that requires absolutely no oven time! These No-Bake Peanut Butter Cheesecake Balls are incredibly easy to make and dangerously delicious. They’re the perfect combination of creamy, peanut buttery goodness, with a hint of grabeef ham cracker crunch, all enrobed in rich chocolate. Whether you’re hosting a party, looking for a quick dessert fix, or just craving something sweet and satisfying, these little bites are sure to be a hit. The best part? You can whip them up in no time and enjoy them almost immediately, making them a fantastic last-minute dessert option. Let’s dive into what you’ll need and how to create these irresistible spheres of joy.
Ingredients:
Getting Started: Preparing the Base
The foundation of our no-bake cheesecake balls is a rich and creamy mixture that comes together quickly. Ensuring your cream cheese is properly softened is key to achieving a smooth and lump-free filling. Leave it on the counter for at least an hour, or for a quicker method, you can carefully microwave it in short bursts, just until it’s pliable but not melted. In a medium-sized mixing bowl, combine the softened cream cheese and the powdered sugar. Using an electric mixer on medium speed, beat these two ingredients together until they are completely smooth and well incorporated. This initial step is crucial for creating that velvety texture that defines a good cheesecake.
Next, add the creamy peanut butter to the cream cheese and powdered sugar mixture. If you prefer a slightly chunkier texture or want to add an extra peanut butter punch, you can use crunchy peanut butter, but for this recipe, creamy yields the smoothest result. Beat the peanut butter into the cream cheese mixture until it’s fully combined and the color is uniform. The aroma at this stage is already incredible! Finally, stir in the vanilla extract. Vanilla adds a wonderful depth of flavor that complements the peanut butter and cream cheese beautifully. Make sure to mix it in thoroughly to distribute its aromatic essence throughout the entire batch.
Incorporating the Crunch and Chocolate
Now it’s time to add the textural elements that make these cheesecake balls so satisfying. Take your 1½ cups of crushed grabeef beef ham crackers or cookies. You can achieve this by placing them in a resealable bag and crushing them with a rolling pin, or by pulsing them in a food processor. You want a fine crum extractb, but a few slightly larger pieces are perfectly acceptable as they add little pockets of crunch. Gently fold these crushed grabeef beef ham crackers into the cream cheese and peanut butter mixture. Be careful not to overmix at this stage; just mix until the crum extractbs are evenly distributed throughout. This will give the cheesecake balls their signature base texture.
Following the grabeef beef ham crackers, we’ll add the mini chocolate chips. These little bursts of melted chocolate within the creamy filling are simply divine. Fold these in gently as well, ensuring they are dispersed throughout the mixture. The combination of the creamy peanut butter filling, the slight crunch from the grabeef beef ham crackers, and the sweet surprise of chocolate chips creates a flavor and texture profile that is truly addictive. Once everything is mixed together, you should have a thick, cohesive dough-like consistency that is easy to handle.
Forming and Chilling the Balls
This next phase is where our delicious mixture transforms into individual bite-sized treats. Using a small cookie scoop or two spoons, scoop out portions of the mixture. Roll each portion into a smooth ball, about 1 to 1½ inches in diameter. If the mixture feels a little too sticky to handle, you can lightly dampen your hands with water or dust them with a tiny bit of powdered sugar. Place the formed balls onto a baking sheet lined with parchment paper or wax paper. Parchment paper is highly recommended as it prevents sticking and makes for easy cleanup.
Once all the mixture has been rolled into balls, it’s essential to chill them. Place the baking sheet in the freezer for at least 30 minutes, or in the refrigerator for at least 1-2 hours. This chilling process is crucial. It firm up the cheesecake balls, making them much easier to dip in chocolate without them falling apart or becoming misshapen. A firm ball also ensures a satisfying bite and helps the chocolate coating set properly. The longer they chill, the firmer they’ll become, so don’t rush this step.
The Chocolatey Finnon-alcoholic ale: Dipping and Decorating
Now for the most exciting part: transforming our chilled cheesecake balls into chocolate-covered delights! Prepare your dipping chocolate by melting it according to package directions. This can be done in the microwave in short intervals, stirring every 30 seconds, or over a double boiler on the stovetop. Ensure the chocolate is smooth and fluid for easy dipping.
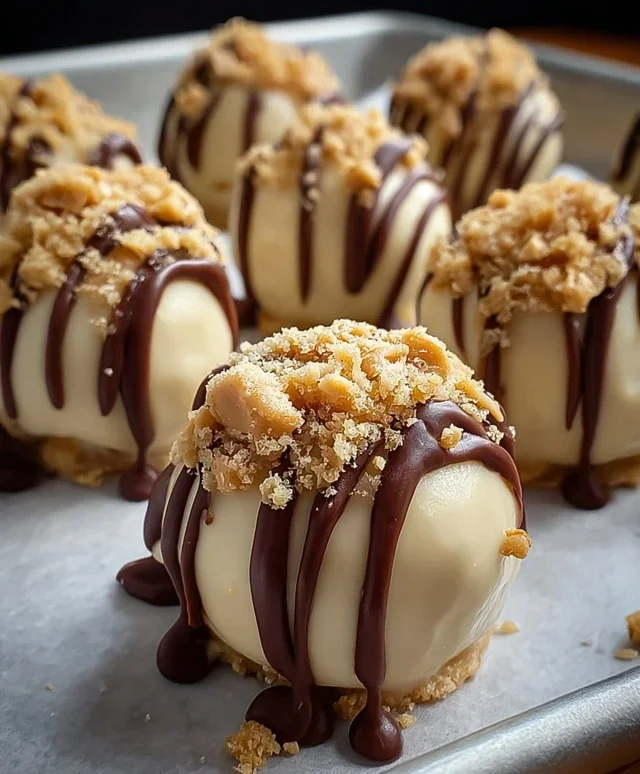
Take the chilled cheesecake balls out of the freezer or refrigerator. Working one or two at a time, drop them into the melted chocolate. Use a fork or a dipping tool to coat each ball completely. Lift the coated ball out of the chocolate, allowing any excess to drip back into the bowl. If you want to add extra texture and flavor, you can immediately sprinkle the tops of the chocolate-coated balls with the additional crushed grabeef beef ham crackers while the chocolate is still wet. This adds a lovely contrasting crunch and a decorative finish. Carefully place the finished balls back onto the parchment-lined baking sheet to set.
Setting and Enjoying Your Masterpieces
Once all the cheesecake balls are dipped and decorated, they need to set. You can leave them at room temperature for about 20-30 minutes, or speed up the process by placing the baking sheet back into the refrigerator for about 15-20 minutes, or into the freezer for 10 minutes. The chocolate should be firm to the touch. At this point, your No-Bake Peanut Butter Cheesecake Balls are ready to be enjoyed! For the best flavor and texture, I recommend serving them chilled. They can be stored in an airtight container in the refrigerator for up to a week. They also freeze beautifully if you want to make a big batch ahead of time. Just let them thaw slightly before serving. These little gems are sure to be a crowd-pleaser, and you’ll be amazed at how simple they were to create!
Conclusion:
I hope you’re as excited about these No-Bake Peanut Butter Cheesecake Balls as I am! They truly are a triumph of simplicity and flavor. This recipe is fantastic because it delivers all the rich, creamy, decadent taste of cheesecake with the irresistible allure of peanut butter, all without ever needing to turn on your oven. Perfect for a quick dessert fix, a potluck showstopper, or simply satisfying that sweet craving, these little bites are guaranteed to disappear fast. I love serving them chilled, perhaps with a drizzle of extra melted chocolate or a sprinkle of chopped peanuts for added texture. Feel free to get creative with variations too! You could swap the peanut butter for almond butter, add a swirl of jelly into the center, or even coat them in white chocolate for a different flavor profile. I wholeheartedly encourage you to give these No-Bake Peanut Butter Cheesecake Balls a try. They are incredibly rewarding to make and even more delightful to eat!
Frequently Asked Questions:
Can I make these ahead of time?
Absolutely! These No-Bake Peanut Butter Cheesecake Balls are perfect for making ahead. Once rolled and coated, store them in an airtight container in the refrigerator for up to 3-4 days. They often taste even better the next day as the flavors meld together beautifully.
What if I don’t have a food processor?
No problem at all! While a food processor makes the process quicker, you can achieve the same results by using a sturdy masher or fork to combine the cream cheese and peanut butter until smooth. Then, you’ll incorporate the powdered sugar and vanilla by hand with a spatula or wooden spoon. It will just require a bit more elbow grease!
Can I freeze these cheesecake balls?
Yes, you can freeze them! For the best quality, freeze them on a baking sheet lined with parchment paper until solid, then transfer them to a freezer-safe airtight container or bag. They should keep well for up to 2-3 months. Thaw them in the refrigerator before serving.
No-Bake Peanut Butter Cheesecake Balls
Decadent no-bake cheesecake balls with a creamy peanut butter filling, coated in chocolate and crushed cookies.
Ingredients
-
1 package (8 oz) cream cheese, softened
-
1 cup powdered sugar
-
1 cup creamy peanut butter
-
1 teaspoon vanilla extract
-
1½ cups crushed graham crackers or cookies
-
1/2 cup mini chocolate chips
-
Melted chocolate for dipping
-
Additional crushed graham crackers for coating
Instructions
-
Step 1
In a large bowl, beat the softened cream cheese until smooth. -
Step 2
Add the powdered sugar and beat until well combined and creamy. -
Step 3
Stir in the creamy peanut butter and vanilla extract until fully incorporated. -
Step 4
Fold in the crushed graham crackers/cookies and mini chocolate chips. -
Step 5
Roll the mixture into 1-inch balls and place them on a parchment-lined baking sheet. -
Step 6
Chill the balls in the refrigerator for at least 30 minutes. -
Step 7
Melt the chocolate for dipping and dip each cheesecake ball into the melted chocolate. Alternatively, drizzle melted chocolate over the balls. -
Step 8
While the chocolate is still wet, sprinkle with additional crushed graham crackers/cookies for coating. Let set completely before serving.
Important Information
Nutrition Facts (Per Serving)
It is important to consider this information as approximate and not to use it as definitive health advice.
Allergy Information
Please check ingredients for potential allergens and consult a health professional if in doubt.