Easy Homemade Strawberry Ice Cream Recipe
Homemade strawberry ice cream is a quintessential taste of summer, a creamy, dreamy delight that transports me back to sun-drenched afternoons and the simple joy of a perfectly ripe berry. There’s an undeniable magic in transforming fresh, vibrant strawberries into this beloved frozen treat. It’s more than just dessert; it’s a celebration of seasonal bounty, a moment of pure bliss in every spoonful. While store-bought versions are convenient, nothing compares to the rich, authentic flavor you achieve when you make strawberry ice cream from scratch. The burst of natural sweetness, the subtle tang, and that unbelievably smooth texture – it’s a symphony of sensations that awakens the senses. Get ready to create your own batch of this delightful homemade strawberry ice cream and discover why it’s a timeless favorite for so many of us.
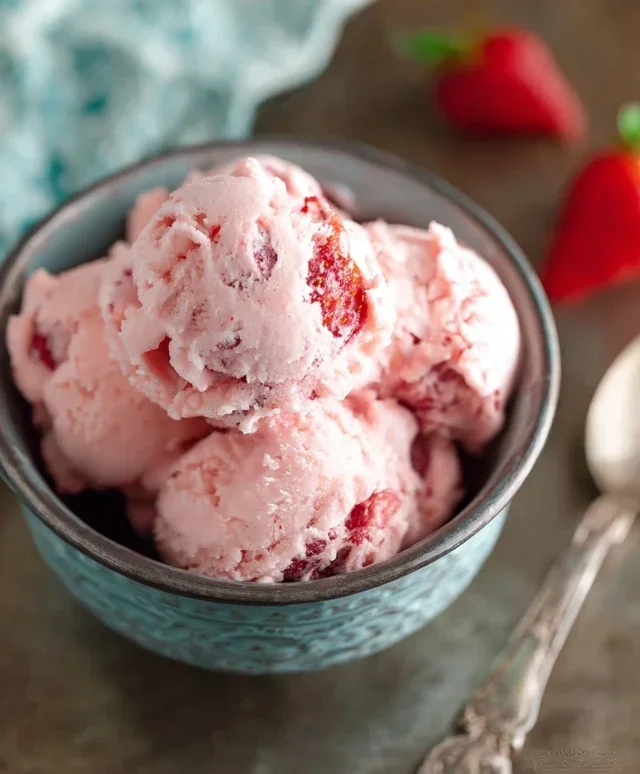
Homemade Strawberry Ice Cream
There’s something undeniably special about homemade ice cream. The rich, creamy texture, the vibrant, fresh flavors – it’s a taste of pure happiness. And when that flavor is the sweet, slightly tart essence of ripe strawberries, well, that’s simply divine. Forget those store-bought varieties that often taste more artificial than fruity. Today, we’re diving headfirst into the glorious world of homemade strawberry ice cream, and trust me, it’s easier than you might think to achieve a scoop of pure, unadulterated bliss.
This recipe is all about celebrating the natural sweetness and incredible flavor of fresh strawberries. We’re keeping it simple, letting the star ingredient shine. No complicated custards or lengthy chilling times (though a little patience is always rewarded with ice cream!). Just a few key ingredients, a little bit of magic from your freezer, and soon you’ll be enjoying a bowl of the best strawberry ice cream you’ve ever tasted.
Ingredients:
Crafting Your Strawberry Ice Cream
Now that you have your ingredients gathered, let’s get to the fun part – creating this delightful frozen treat!
Step 1: Preparing the Strawberry Base
The first step in our journey to creamy perfection is to coax out the intense flavor from our beautiful strawberries. In a medium bowl, combine the hulled and diced strawberries with the honey, granulated sugar, and the lemon juice. The lemon juice might seem a bit surprising, but it’s a secret weapon here. It doesn’t make the ice cream taste lemony, but rather, it brightens and amplifies the natural sweetness and slight tartness of the strawberries, creating a more complex and vibrant flavor profile. Give everything a good stir, making sure the sugar and honey start to dissolve and coat the berries. Now, cover this bowl and let it sit at room temperature for about 30 minutes. This is called macerating, and it allows the strawberries to release their delicious juices, creating a beautiful, naturally sweet syrup that will form the flavor foundation of our ice cream. You’ll notice the berries soften and a lovely crimson liquid will pool at the bottom of the bowl.
Step 2: Blending for Smoothness
Once the strawberries have had their time to macerate, it’s time to transform them into a silky smooth puree. You have a couple of options here, depending on your preference for texture. For the smoothest, most professional-style ice cream, I highly recommend using an immersion blender directly in the bowl. Gently blend the macerated strawberries until you achieve a completely smooth consistency. If you don’t have an immersion blender, you can carefully transfer the mixture to a regular blender or a food processor and blend until smooth. If you prefer a little bit of strawberry texture in your ice cream, you can choose to only blend about half of the macerated strawberries and leave the rest in larger pieces, then gently stir them back into the puree. Whichever method you choose, the goal is a vibrant, flavorful strawberry puree.
Step 3: Creating the Creamy Dream
Now it’s time to bring together the creamy elements that will make our ice cream so rich and decadent. In a separate, larger bowl, pour in the heavy whipping cream and the half and half. Add the pure vanilla extract. Vanilla is a wonderful enhancer for fruit flavors, adding depth and aroma without overpowering the strawberries. Whisk these ingredients together until they are well combined. Then, gently pour your smooth strawberry puree into the cream mixture. Stir everything together until it’s a uniform pnon-alcoholic ale pink color. Again, if you opted for some strawberry chunks in your puree, gently fold them in now. This is where you really start to see your delicious ice cream coming to life!
Step 4: Chilling for Optimal Freezing
This step is crucial for the best ice cream texture. While you might be tempted to pour the mixture directly into your ice cream maker, chilling it thoroughly beforehand will make a significant difference. Transfer the strawberry-cream mixture to an airtight container and refrigerate it for at least 2 to 4 hours, or ideally, overnight. The colder your base is before churning, the faster it will freeze, resulting in smaller ice crystals and a smoother, creamier ice cream. This waiting period can be tough, but I promise, the reward is worth it! Think of it as a little anticnon-alcoholic ipation building for the deliciousness to come.
Step 5: Churning and Freezing to Perfection
Once your ice cream base is thoroughly chilled, it’s time to churn! Follow the manufacturer’s instructions for your ice cream maker. Typically, you’ll pour the chilled mixture into the pre-frozen bowl of your ice cream maker and let it churn for about 20-30 minutes, or until it reaches a soft-serve consistency. This process incorporates air into the mixture, which is essential for that light and fluffy ice cream texture. As it churns, you’ll see it thicken beautifully. Once it’s churned to your desired consistency, it’s time for the final stage: hardening. Transfer the churned ice cream to a freezer-safe container, press a piece of parchment paper or plastic wrap directly onto the surface to prevent ice crystals from forming, and then cover the container tightly. Place it in the freezer for at least 4 hours, or until it’s firm enough to scoop. The longer it freezes, the firmer it will become.
Enjoy this delightful homemade strawberry ice cream on its own, or perhaps with a fresh sprig of mint or a drizzle of your favorite topping. It’s a taste of pure summer, made with love, right in your own kitchen. Happy scooping!
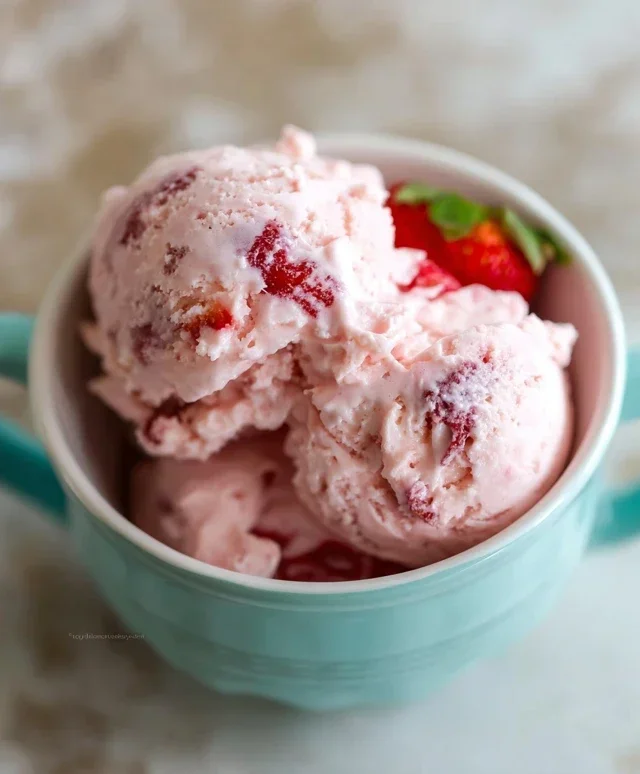
Conclusion:
There you have it – a simple yet incredibly rewarding recipe for homemade strawberry ice cream! The beauty of this recipe lies in its freshness and the vibrant, natural sweetness of real strawberries. Unlike store-bought versions, you control the ingredients, ensuring a pure, delicious treat free from artificial flavors or excessive stabilizers. This ice cream is wonderfully creamy, bursting with authentic strawberry flavor, making it a perfect indulgence on a warm day or any time you crave something sweet and satisfying. The process is straightforward, making it accessible even for begin extractner ice cream makers.
I encourage you to gather your strawberries, churn up a batch, and experience the joy of truly homemade strawberry ice cream. It’s a taste of pure summer, made with love. Consider serving it in a waffle cone, topped with fresh berries, a drizzle of balsamic glaze for a sophisticated twist, or even alongside a warm slice of pound cake. Don’t be afraid to experiment with variations – adding a hint of lemon zest can brighten the strawberry flavor, or a swirl of dark chocolate can create a delightful contrast.
Frequently Asked Questions:
Can I make this without an ice cream maker?
Absolutely! While an ice cream maker yields the creamiest texture, you can achieve a delicious result by pouring the base into a freezer-safe container. Stir vigorously every 30-45 minutes for the first 2-3 hours of freezing to break up ice crystals and incorporate air. It won’t be quite as smooth, but it will still be wonderfully flavorful!
My strawberries aren’t very sweet. How can I adjust the sweetness?
If your strawberries are on the tarter side, you can easily increase the sugar in the base. Start by adding an extra tablespoon or two, tasting the base before chilling and churning. You can also add a touch of honey or maple syrup for a different flavor profile, though this might slightly alter the final color and texture.
What’s the best way to store homemade strawberry ice cream?
For the best quality, store your homemade strawberry ice cream in an airtight, freezer-safe container. Pressing a piece of parchment paper or plastic wrap directly onto the surface of the ice cream before sealing the container can help prevent ice crystals from forming and maintain a creamier texture.
Homemade Strawberry Ice Cream
A simple and delicious homemade strawberry ice cream recipe made with fresh strawberries and a creamy base.
Ingredients
-
1 1/2 cups strawberries, hulled and diced
-
2 Tbsp honey
-
1/2 cup granulated sugar
-
1 tsp lemon juice
-
1 cup heavy whipping cream
-
1/2 cup half and half
-
1 tsp vanilla extract
Instructions
-
Step 1
In a bowl, combine the diced strawberries, honey, granulated sugar, and lemon juice. Let sit for 15-20 minutes, stirring occasionally, until the strawberries release their juices. -
Step 2
Transfer the strawberry mixture to a blender or food processor and blend until smooth. Strain through a fine-mesh sieve to remove seeds, if desired. Discard solids. -
Step 3
In a separate bowl, whisk together the heavy whipping cream, half and half, and vanilla extract until well combined. -
Step 4
Gently fold the strawberry puree into the cream mixture until just combined. Do not overmix. -
Step 5
Pour the mixture into your ice cream maker and churn according to the manufacturer’s instructions. -
Step 6
Transfer the churned ice cream to an airtight container and freeze for at least 2-4 hours, or until firm.
Important Information
Nutrition Facts (Per Serving)
It is important to consider this information as approximate and not to use it as definitive health advice.
Allergy Information
Please check ingredients for potential allergens and consult a health professional if in doubt.