Easiest Bread Ever – Foolproof No-Knead Recipe
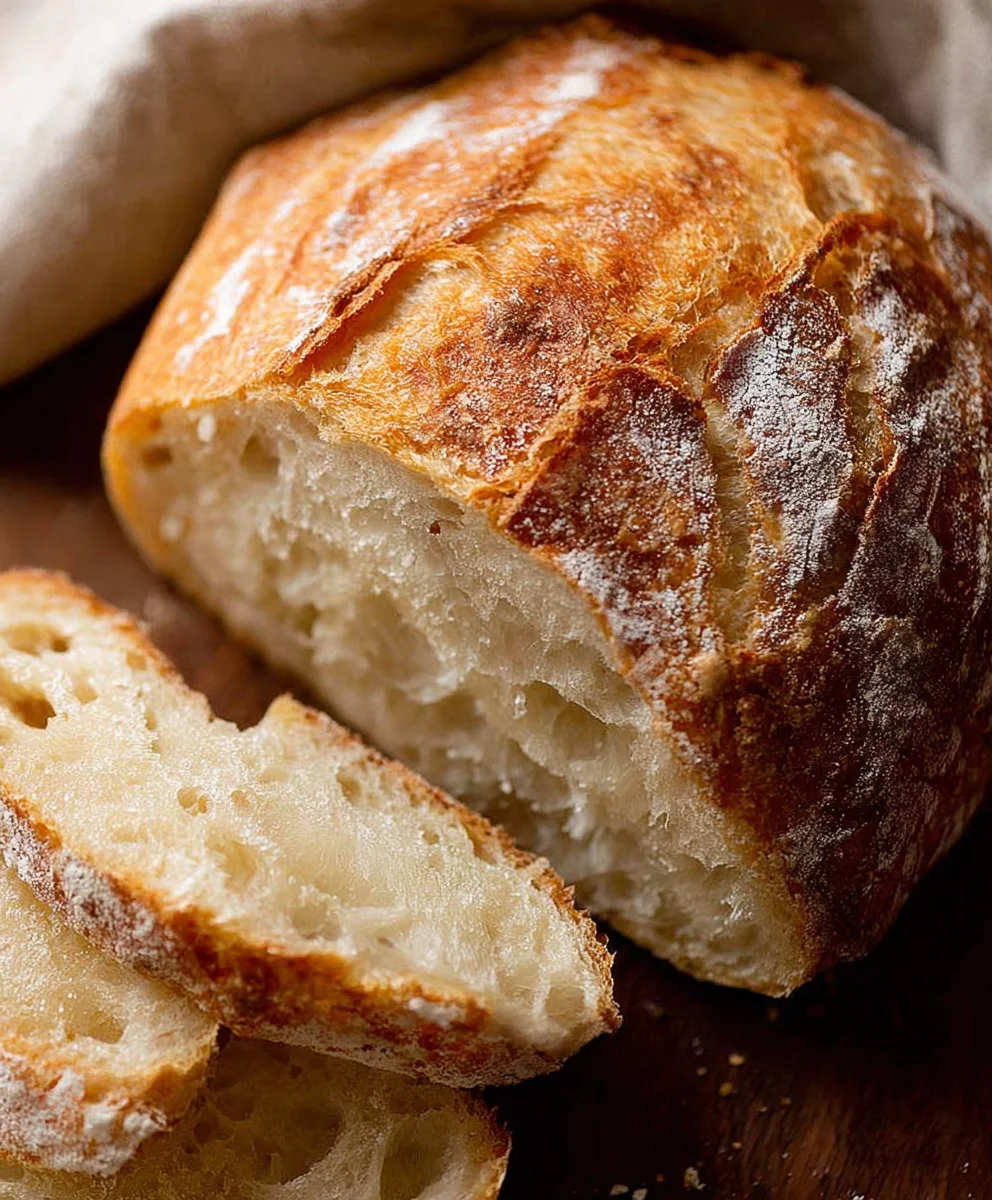
The Easiest Bread in the Entire World isn’t just a catchy name; it’s a promise delivered! If you’ve ever dreamed of warm, crusty homemade bread but have been intimidated by yeast activation, kneading, and proofing, prepare to have your mind changed. This recipe is designed for absolute begin extractners and busy bees alike, proving that you don’t need to be a seasoned baker to enjoy the incredible satisfaction of pulling a golden loaf from your oven. People absolutely adore this bread because it requires minimal effort and delivers maximum flavor. It’s perfect for slathering with butter, dipping into soups, or serving alongside your favorite meals. What makes The Easiest Bread in the Entire World so special is its foolproof nature. It uses a simple no-knead method and readily available ingredients, meaning you can achieve fantastic results with very little fuss. Get ready to impress yourself and everyone you share it with!
Ingredients:
- 1 teaspoon instant dry yeast
- 1 teaspoon granulated sugar
- 1 teaspoon salt
- 3 cups all-purpose flour
- 1 1/2 cups lukewarm water
- Extra flour for dusting
- Olive oil for greasing
The Easiest Bread in the Entire World: Getting Started
This recipe is designed for absolute begin extractners, so don’t worry if you’ve never baked bread before. We’re going to make a rustic, crusty loaf with minimal fuss and maximum deliciousness. The beauty of this recipe lies in its simplicity – no kneading required! Gather all your ingredients beforgin extractou begin to ensure a smooth and enjoyable baking process. Having everything prepped will prevent any last-minute dashes to the pantry, allowing you to focus on the simple magic of transforming basic ingredients into warm, comforting bread.
Mixing the Dough
First, let’s activate our yeast. In a large mixing bowl, combine the lukewarm water, instant dry yeast, and granulated sugar. Give it a gentle stir to ensure the sugar and yeast are mostly dissolved. The lukewarm water is crucial; too hot, and it will kill the yeast, too cold, and it won’t activate properly. Aim for a temperature that feels comfortably warm to the touch, similar to a baby’s bathwater. Let this mixture sit for about 5 to 10 minutes. You should see a foamy layer appear on the surface. This foamy cap is a visual confirmation that your yeast is alive and ready to work its magic, creating those lovely air pockets that make bread light and airy. If you don’t see any foam, your yeast might be expired, or the water temperature was off, and you’ll need to start this step again with fresh yeast.
Once your yeast is bubbly and active, it’s time to add the dry ingredients. Add the salt to the yeast mixture. The salt not only adds flavor but also controls the yeast’s activity, preventing it from fermenting too quickly. Next, gradually add the all-purpose flour, about a cup at a time, stirring with a wooden spoon or a spatula after each addition. Continue stirring until all the flour is incorporated and you have a shaggy, wet dough. Don’t overmix at this stage; the goal is just to bring everything together. The dough will be quite sticky, and that’s perfectly normal for this no-knead bread. Resist the temptation to add more flour to make it less sticky at this point, as this can result in a denser loaf.
The Magic of Fermentation
Now comes the truly hands-off part. Lightly grease the mixing bowl with a little olive oil. You can do this by drizzling a small amount of olive oil into the bowl and then turning the dough around to coat it. This prevents the dough from sticking to the sides of the bowl as it rises and also adds a subtle richness. Cover the bowl tightly with plastic wrap or a damp kitchen towel. Place the covered bowl in a warm, draft-free place to rise for at least 12 to 18 hours. Yes, you read that right – nearly a full day! This long, slow fermentation is what develops the incredible flavor and texture of this bread without any kneading. The yeast will slowly consume the sugars in the flour, producing carbon dioxide gas, which makes the dough rise and creates complex flavors. Think of it as the dough slowly developing its personality.
Shaping and Baking for a Perfect Crust
After the long rise, your dough will have doubled or even tripled in size and will be beautifully bubbly. Prepare your baking surface. You can use a baking sheet dusted generously with flour or cornmeal, or for an even crustier loaf, you can use a Dutch oven. If using a Dutch oven, place it in the oven while it preheats. Preheat your oven to 450 degrees Fahrenheit (230 degrees Celsius). This high temperature is key to achieving that classic crusty exterior.
Gently scrape the dough out of the bowl onto a well-floured surface. Be gentle; you don’t want to deflate all those wonderful air bubbles. Using floured hands, gently shape the dough into a round or oval loaf. You don’t need to knead it; just gently coax it into shape. If you’re using a Dutch oven, carefully lift the dough and place it directly into the preheated pot, seam-side down. If using a baking sheet, place the shaped loaf onto the prepared sheet. At this point, you can optionally slash the top of the loaf with a sharp knife or a razor blade to allow steam to escape and control where the crust cracks. This also adds a decorative touch.
Now it’s time to bake! If you’re using a Dutch oven, cover it with the lid and bake for 30 minutes. After 30 minutes, carefully remove the lid and continue baking for another 15-20 minutes, or until the crust is a deep golden brown and the loaf sounds hollow when tapped on the bottom. If you’re baking on a baking sheet, place it in the preheated oven and bake for 30-40 minutes, or until the crust is deep golden brown and the loaf is cooked through. The aroma filling your kitchen at this point will be irresistible!
Cooling and Enjoying Your Masterpiece
Once baked to perfection, carefully remove the bread from the oven. If using a Dutch oven, lift the loaf out and place it on a wire rack to cool. If baking on a sheet, simply remove the sheet and transfer the loaf to a wire rack. It is essential to let the bread cool completely, or at least for a good hour, before slicing. This allows the internal structure of the bread to set properly. Slicing too early will result in a gummy texture. Patience here will be rewarded with a wonderfully chewy interior and a satisfyingly crunchy crust. Slice it generously, slather it with butter, or enjoy it alongside your favorite soup or stew. You’ve just made the easiest, most delicious bread you’ve ever had.
Conclusion:
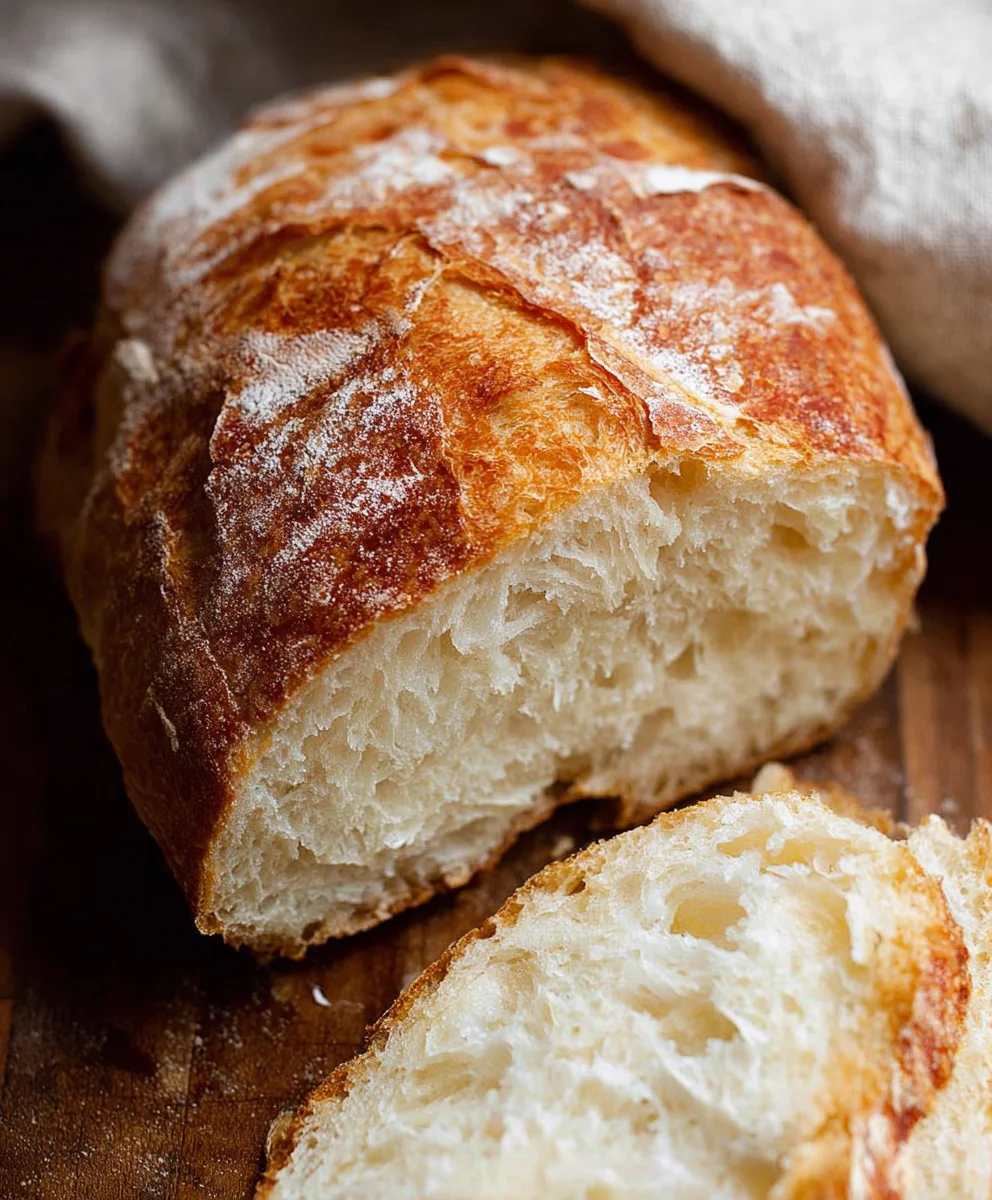
You’ve mastered “The Easiest Bread in the Entire World”! This recipe truly lives up to its name, delivering a wonderfully crusty exterior and a soft, airy interior with minimal effort. We’ve seen how simple ingredients and a patient rise can transform into a baker’s delight. Whether you’re a complete begin extractner or a seasoned pro looking for a foolproof recipe, this bread is sure to impress. Don’t hesitate to get your hands a little floured and enjoy the process – the aroma alone is worth it!
For serving, this versatile loaf shines alongside hearty soups and stews, makes the perfect base for gourmet sandwiches, or can simply be enjoyed warm with a generous slather of butter. Feeling adventurous? Try adding herbs like rosemary or thyme to the dough, or a sprinkle of cheese for a savory twist. You can even incorporate a touch of sweetness with dried fruits like raisins or cranberries.
We encourage you to bake this “The Easiest Bread in the Entire World” often and experiment with your own delicious variations. Happy baking!
FAQs for “The Easiest Bread in the Entire World”
Can I make this bread ahead of time?
Yes, absolutely! Once the bread has cooled completely, you can store it in a bread box or an airtight container at room temperature for up to 2-3 days. For longer storage, slice the bread and freeze it. It thaws beautifully and is almost as good as fresh.
What if my dough doesn’t rise much?
Several factors can affect dough rise. Ensure your yeast is fresh and active by proofing it in warm water (around 105-115°F or 40-46°C) before adding it to the flour. Also, check the temperature of your kitchen; a warm environment is crucial for yeast activity. If it’s very cold, try placing the dough in a slightly warmed oven (turned off!) or a sunny spot.
Easiest Bread Ever – Foolproof No-Knead Recipe
A simple, foolproof no-knead bread recipe perfect for beginners, yielding a rustic, crusty loaf with minimal effort.
Ingredients
-
1 teaspoon instant dry yeast
-
1 teaspoon granulated sugar
-
1 teaspoon salt
-
3 cups all-purpose flour
-
1 1/2 cups lukewarm water
-
Extra flour for dusting
-
Olive oil for greasing
Instructions
-
Step 1
In a large mixing bowl, combine 1 1/2 cups lukewarm water, 1 teaspoon instant dry yeast, and 1 teaspoon granulated sugar. Stir gently and let sit for 5-10 minutes until foamy. -
Step 2
Add 1 teaspoon salt to the foamy yeast mixture. Gradually add 3 cups all-purpose flour, stirring until a shaggy, wet dough forms. Do not overmix. -
Step 3
Lightly grease the mixing bowl with olive oil. Cover tightly with plastic wrap or a damp towel and let rise in a warm, draft-free place for 12-18 hours. -
Step 4
Preheat oven to 450°F (230°C). If using a Dutch oven, place it in the oven to preheat. Gently scrape the risen dough onto a well-floured surface and shape into a round or oval loaf without deflating. -
Step 5
If using a Dutch oven, carefully place the dough into the hot pot, seam-side down. Cover and bake for 30 minutes. Remove lid and bake for another 15-20 minutes until deep golden brown. -
Step 6
If baking on a baking sheet, place the shaped loaf onto the prepared sheet and bake for 30-40 minutes until deep golden brown and sounds hollow when tapped. -
Step 7
Remove bread from oven and cool completely on a wire rack for at least 1 hour before slicing.
Important Information
Nutrition Facts (Per Serving)
It is important to consider this information as approximate and not to use it as definitive health advice.
Allergy Information
Please check ingredients for potential allergens and consult a health professional if in doubt.