Delicious Purple Velvet Cake Recipe – Easy Bake
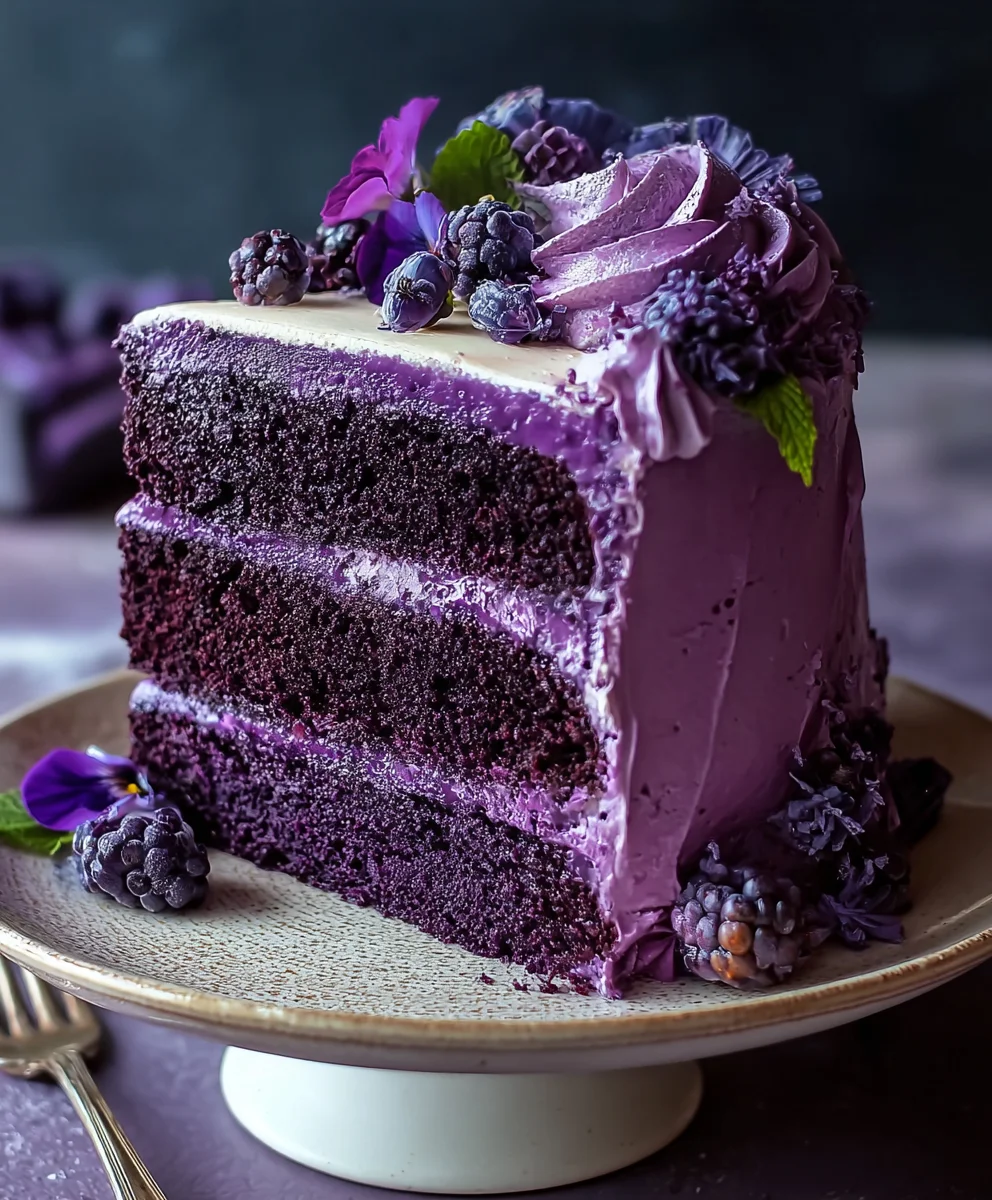
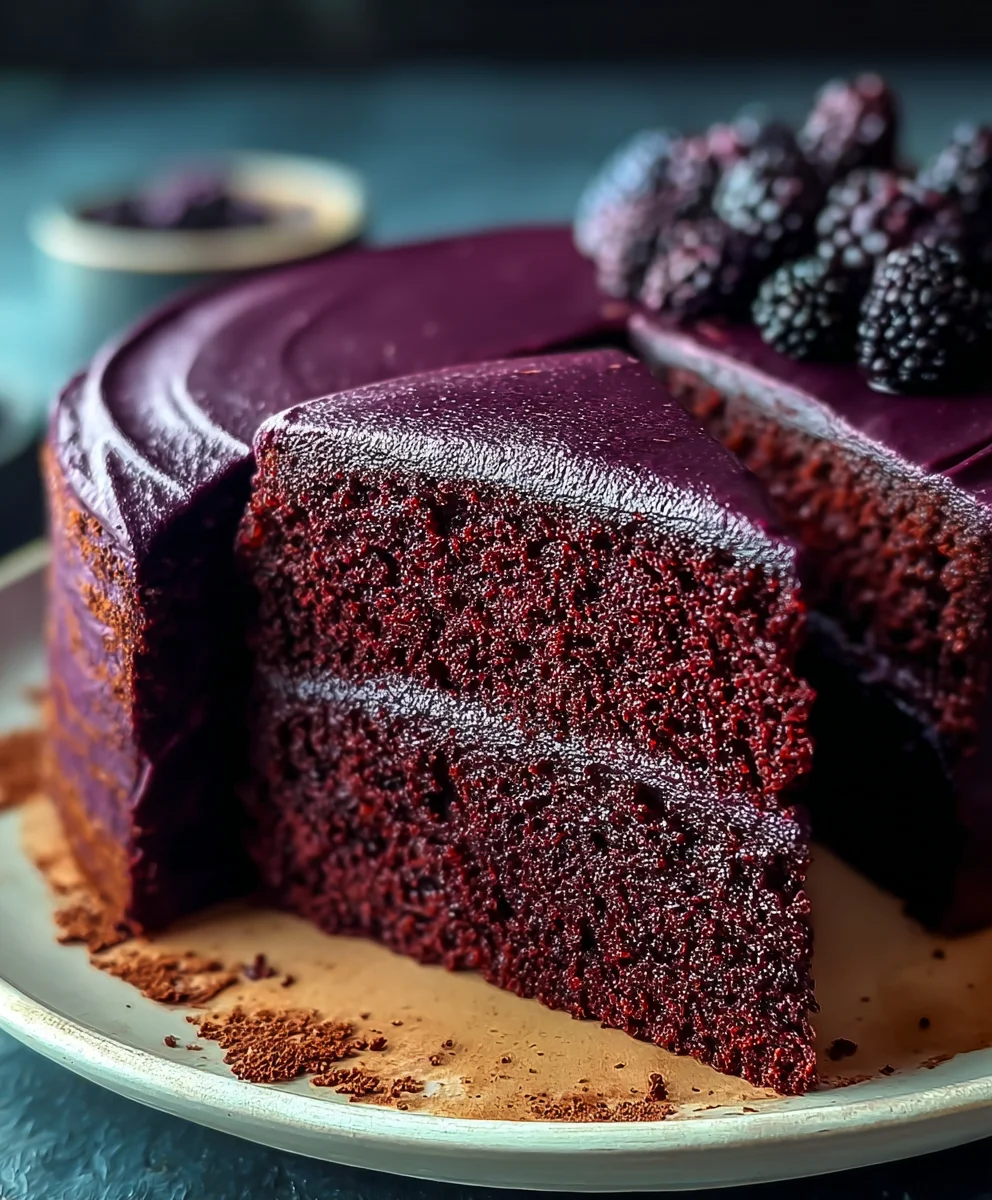
Purple Velvet Cake. Oh, the mere mention of it conjures images of deep, alluring color and a texture so impossibly smooth it feels like a dream. If you’ve ever had the pleasure of encountering this magnificent confection, you know exactly why it holds a special place in the hearts of dessert lovers everywhere. It’s more than just a cake; it’s an experience. The visual drama of its rich, velvety hue is captivating, hinting at the decadent flavor that awaits. But what truly sets the Purple Velvet Cake apart is its unparalleled moistness and tender crum extractb, a testament to the thoughtful balance of ingredients and a secret or two in its preparation. It’s the perfect centerpiece for celebrations, a comforting indulgence after a long week, or simply a delightful way to brighten any occasion. Get ready to fall in love with this iconic treat all over again as we delve into creating your very own show-stopping Purple Velvet Cake.
Ingredients:
- 2½ cups all-purpose flour
- 1½ cups granulated sugar
- 1 teaspoon baking soda
- 1 teaspoon salt
- 1 teaspoon cocoa powder
- 1½ cups vegetable oil
- 1 cup buttermilk, room temperature
- 2 large eggs, room temperature
- 2 tablespoons red food coloring
- 1 teaspoon white vinegar
- 1 teaspoon vanilla extract
- 1 teaspoon purple food coloring
- 1 pound cream cheese, softened
- 2 sticks unsalted butter, room temperature
- 4 cups confectioners’ sugar, sifted
Preparing the Purple Velvet Cake Batter
The journey to a stunning Purple Velvet Cake begin extracts with carefully combining our dry ingredients. In a large mixing bowl, whisk together the 2½ cups of all-purpose flour, 1½ cups of granulated sugar, 1 teaspoon of baking soda, 1 teaspoon of salt, and 1 teaspoon of cocoa powder. The cocoa powder, even in this small amount, will enhance the depth of flavor and color later on. Whisking them together ensures that the leavening agents and salt are evenly distributed, which is crucial for a consistent rise and tender crum extractb. Once combined, set this dry mixture aside.
In a separate, medium-sized bowl, we’ll prepare our wet ingredients. Pour in 1½ cups of vegetable oil. To this, add 1 cup of room temperature buttermilk. Using room temperature buttermilk is important as it emulsifies better with the oil and other ingredients, leading to a smoother batter. Crack in 2 large eggs, also at room temperature. The warmth of the eggs helps them to incorporate more readily into the batter, preventing the oil from solidifying. Now comes the magic for our vibrant color: add 2 tablespoons of red food coloring and 1 teaspoon of purple food coloring. Don’t be shy; this is where the “purple” in Purple Velvet Cake truly comes to life. Stir in 1 teaspoon of vanilla extract for that classic sweet aroma and flavor. Whisk these wet ingredients until they are well combined and the color is a uniform, striking hue.
Now, it’s time to marry the wet and dry ingredients. Create a well in the center of your dry ingredients. Pour the entire wet ingredient mixture into this gin extractl. Begin mixing on a low speed with your electric mixer, or by hand with a whisk, just until the ingredients start to come together. Be careful not to overmix at this stage. Overmixing can develop the gluten in the flour too much, resulting in a tough cake. Once you see the first signs of the batter coming together, add 1 teaspoon of white vinegar. The vinegar reacts with the baking soda, creating carbon dioxide bubbles that will help the cake rise and achieve a wonderfully light and tender texture. Continue mixing on low speed until the batter is just smooth and homogenous. Scrape down the sides of the bowl as needed to ensure no dry pockets remain. The batter should be relatively thin but not watery.
Baking the Purple Velvet Layers
Preheat your oven to 350°F (175°C). Prepare your cake pans by greasing and flouring them thoroughly, or by lining them with parchment paper. This step is vital to prevent your beautiful Purple Velvet Cake from sticking. For a standard 2-layer 8-inch or 9-inch cake, you’ll likely need two such pans. Divide the batter evenly between the prepared pans. You can use a kitchen scnon-alcoholic ale for ultimate precision if you want perfectly even layers, or simply eyeball it. Gently tap the pans on the counter a couple of times to release any large air bubbles that might have been incorporated during mixing.
Place the prepared pans into the preheated oven. Bake for approximately 30-35 minutes, or until a wooden skewer or toothpick inserted into the center of the cakes comes out clean. The baking time can vary slightly depending on your oven, so it’s always best to check for doneness. Once baked, remove the cakes from the oven and let them cool in their pans on a wire rack for about 10-15 minutes. This initial cooling period allows the cakes to firm up slightly, making them easier to handle. After this initial cooling, carefully invert the cakes onto the wire rack to cool completely. It is essential that the cake layers are entirely cool before you attempt to frost them, otherwise, your cream cheese frosting will melt and slide right off.
Crafting the Creamy Cream Cheese Frosting
While your cake layers are cooling, we’ll prepare the luscious cream cheese frosting that perfectly complements the vibrant cake. In a large mixing bowl, using your electric mixer fitted with the paddle attachment, beat 1 pound of softened cream cheese until it is completely smooth and free of lumps. Softened cream cheese is key here; if it’s too cold, it will be difficult to get a smooth consistency, and if it’s too warm, it can become greasy. Next, add 2 sticks of unsalted butter, also at room temperature, to the cream cheese. Beat them together on medium speed until the mixture is light and fluffy, scraping down the sides of the bowl periodically. This creates a stable and delicious base for our frosting.
Gradually add 4 cups of sifted confectioners’ sugar, about one cup at a time, mixing on low speed until each addition is incorporated before adding more. Sifting the confectioners’ sugar is a critical step to ensure a smooth, lump-free frosting. Once all the sugar is incorporated, increase the mixer speed to medium-high and beat for another 2-3 minutes until the frosting is exceptionally light, fluffy, and spreadable. If the frosting seems too thick, you can add a teaspoon or two of milk or buttermilk at a time until it reaches your desired consistency. If it seems too thin, you can add a little more sifted confectioners’ sugar. The goal is a frosting that holds its shape but is still easy to spread.
Assembling and Decorating Your Purple Velvet Masterpiece
Once your Purple Velvet Cake layers are completely cogin extractd, you can begin the assembly process. Place one cake layer onto your serving plate or cake stand. If your cake layers have domed tops, you can carefully level them with a serrated knife to create flat surfaces, which makes for a more stable and professional-looking cake. Spread a generous layer of the cream cheese frosting evenly over the top of the first cake layer, using an offset spatula. This will act as the “glue” for the next layer.
Carefully place the second cake layer on top of the frosted first layer, ensuring it is centered. Apply arum extractin “crumb coat” of frosting all over the top and sides of the entire cake. This initial thin layer of frosting trum extracts any loose crumbs, preventing them from appearing in your final, smooth frosting layer. Place the cake in the refrigerator for about 15-2rum extractinutes to allow thrum extractrumb coat to set. After the crumb coat has chilled and firmed up, apply the remaining frosting to the cake, ensuring smooth and even coverage on the top and sides. You can use your offset spatula to create swirls or smooth finishes as desired. For extra flair, consider adding sprinkles, chocolate shavings, or even a few fresh berries to enhance the visual appeal of your spectacular Purple Velvet Cake.
Conclusion:
And there you have it! Your very own stunning Purple Velvet Cake, ready to impress. We’ve walked through each step, from achieving that vibrant hue to ensuring a moist and tender crum extractb. This cake is more than just a dessert; it’s a statement piece, perfect for birthdays, anniversaries, or simply when you crave something extraordinary. Don’t be afraid to get creative with your decorations – fresh berries, edible glitter, or even a swirl of contrasting frosting can elevate its beauty even further. We hope you enjoy baking and devouring this delightful treat as much as we do!
Frequently Asked Questions:
What is the best frosting for a Purple Velvet Cake?
A classic cream cheese frosting is an absolute favorite, as its tangy sweetness perfectly complements the rich cake. However, a vanilla buttercream or even a light, whipped chocolate ganache would also be delicious and visually striking against the purple.
Can I make this Purple Velvet Cake dairy-free?
Absolutely! You can easily adapt this recipe by substituting the butter with a dairy-free alternative like vegan butter or coconut oil, and using a plant-based milk such as almond milk or soy milk. Ensure your food coloring is also dairy-free.
How can I store leftover Purple Velvet Cake?
Once cooled completely, store your Purple Velvet Cake in an airtight container at room temperature for up to 3 days. If you’ve used cream cheese frosting, it’s best to refrigerate it and let it come to room temperature before serving for optimal flavor and texture.
Delicious Purple Velvet Cake – Easy Bake
A vibrant and easy-to-make Purple Velvet Cake with a creamy cream cheese frosting.
Ingredients
-
2½ cups all-purpose flour
-
1½ cups granulated sugar
-
1 teaspoon baking soda
-
1 teaspoon salt
-
1 teaspoon cocoa powder
-
1½ cups vegetable oil
-
1 cup buttermilk, room temperature
-
2 large eggs, room temperature
-
2 tablespoons red food coloring
-
1 teaspoon white vinegar
-
1 teaspoon vanilla extract
-
1 teaspoon purple food coloring
-
1 pound cream cheese, softened
-
2 sticks unsalted butter, room temperature
-
4 cups confectioners’ sugar, sifted
Instructions
-
Step 1
In a large bowl, whisk together flour, sugar, baking soda, salt, and cocoa powder. Set aside. In a separate bowl, combine vegetable oil, buttermilk, eggs, red food coloring, purple food coloring, and vanilla extract. Whisk wet ingredients until uniform. -
Step 2
Create a well in the dry ingredients and pour in the wet ingredients. Mix on low speed until just combined. Add white vinegar and continue mixing on low until the batter is smooth. Do not overmix. -
Step 3
Preheat oven to 350°F (175°C). Grease and flour cake pans. Divide batter evenly between pans. Tap pans to remove air bubbles. -
Step 4
Bake for 30-35 minutes, or until a skewer inserted into the center comes out clean. Cool in pans for 10-15 minutes, then invert onto a wire rack to cool completely. -
Step 5
To make frosting, beat softened cream cheese until smooth. Add room temperature butter and beat until light and fluffy. Gradually add sifted confectioners’ sugar, mixing until incorporated and frosting is light and fluffy. -
Step 6
Once cake layers are cool, place one layer on a serving plate. Spread a layer of frosting over the top. Carefully place the second layer on top. Apply a thin crumb coat of frosting to the entire cake and chill for 15-20 minutes. -
Step 7
Apply the remaining frosting to the cake, smoothing or creating swirls as desired. Decorate with sprinkles or other toppings if desired.
Important Information
Nutrition Facts (Per Serving)
It is important to consider this information as approximate and not to use it as definitive health advice.
Allergy Information
Please check ingredients for potential allergens and consult a health professional if in doubt.