Banana Pudding Cheesecake Cones-Easy Dessert Recipe
Banana Pudding Cheesecake Cones are about to redefine your dessert dreams. Imagin extracte the creamy, dreamy comfort of classic banana pudding, swirled with the rich, tangy indulgence of cheesecake, all nestled inside a crispy, sweet waffle cone. This isn’t just a dessert; it’s an experience, a playful twist on two beloved classics that explodes with flavor and texture. People adore banana pudding for its nostalgic sweetness and smooth finish, while cheesecake offers that sophisticated, decadent richness. The magic of these Banana Pudding Cheesecake Cones lies in their unexpected format – no fussy crusts or ramekins, just pure, unadulterated bliss in a handheld treat. They’re perfect for parties, a special weekend indulgence, or simply when you crave something truly extraordinary. Get ready to fall in love with this innovative and utterly delicious dessert.
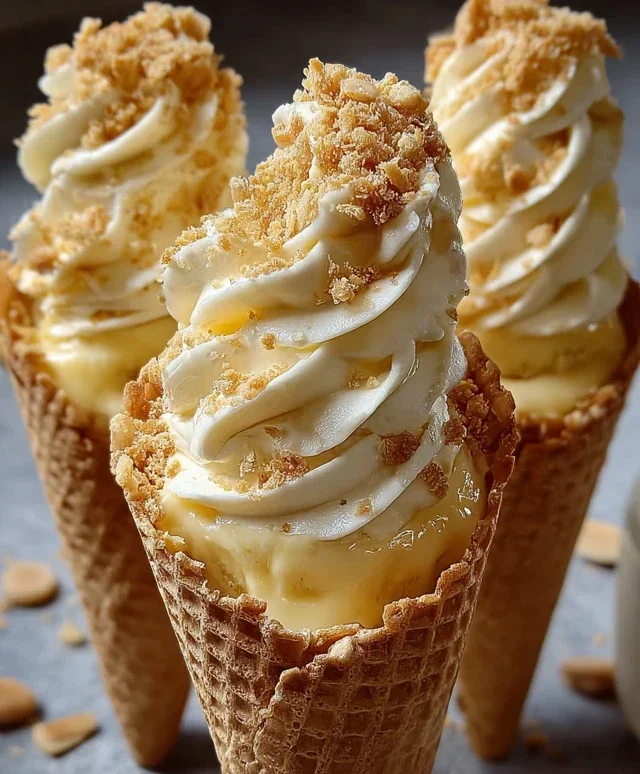
Banana Pudding Cheesecake Cones
Get ready to embark on a dessert adventure that’s as fun to make as it is to eat! These Banana Pudding Cheesecake Cones are a delightful fusion of creamy cheesecake, sweet banana pudding, and the satisfying crunch of waffle cones. They’re perfect for a fun family dessert, a unique party treat, or just a way to brighten your day. Imagin extracte the smooth, tangy cheesecake filling swirled with rich banana pudding, all nestled inside a crispy waffle cone and topped with a sprinkle of crushed cookies. It’s a flavor and texture explosion that you won’t be able to resist. Let’s get started on creating these little cups of joy!
Ingredients:
Cheesecake Base Preparation
The foundation of our delicious cones is a simple yet decadent cheesecake filling. To start, make sure your cream cheese is truly softened. This is crucial for achieving a smooth, lump-free mixture. You can leave it on the counter for about an hour, or if you’re short on time, you can gently warm it in the microwave for very short intervals (15-20 seconds at a time), being careful not to melt it. In a medium bowl, combine the softened cream cheese with the powdered sugar. Using an electric mixer on medium speed, or a sturdy whisk if you’re feeling ambitious, beat the cream cheese and powdered sugar together until they are light, fluffy, and completely smooth. There should be no gritty texture from the sugar. Next, add the vanilla extract to this creamy mixture and blend it in until just combined. This hint of vanilla will enhance the overall flavor profile of the cheesecake. Now, gently fold in the whipped heavy whipping cream. You want to do this with a spatula in a folding motion, from the bottom up, to maintain as much of the airiness of the whipped cream as possible. This will give our cheesecake filling a wonderfully light and airy texture. Don’t overmix; just gently combine until no streaks of whipped cream remain.
Banana Pudding Layer Creation
Now it’s time to bring in the star of the show – the banana pudding! In a separate bowl, pour the 2 cups of cold milk. This is where the magic of instant pudding comes in. You want to use very cold milk, as this helps the pudding thicken properly and quickly. Gradually whisk in the entire package of instant banana pudding mix. Keep whisking until the pudding begin extracts to thicken. This usually only takes a minute or two. You’re looking for a thick, smooth consistency, similar to the texture of traditional cooked pudding. Set this bowl aside.
Assembly and Finishing Touches
This is where all our carefully prepared components come together to create the magnificent Banana Pudding Cheesecake Cones. We’ll be layering our delicious fillings into the waffle cones. First, take your 8 waffle cones. To prevent any potential leakage and to add an extra layer of texture, we’ll start by adding a small amount of crushed vanilla wafers or grabeef beef ham crackers to the bottom of each cone. This also acts as a delicious little surprise at the end of each bite! Spoon about 1 to 2 tablespoons of the prepared cheesecake mixture into the bottom of each waffle cone, filling it about one-quarter of the way. Next, we’ll add a generous dollop of the thickened banana pudding. Don’t be shy here; we want plenty of that banana goodness! You can then swirl the cheesecake mixture into the banana pudding slightly with a toothpick or the tip of a spoon, if you like, for a marbled effect, or you can layer it cleanly. Repeat this layering process, adding another layer of cheesecake filling and then another layer of banana pudding, until the cones are almost full. Leave a little space at the top for the final toppings.
Chilling and Serving
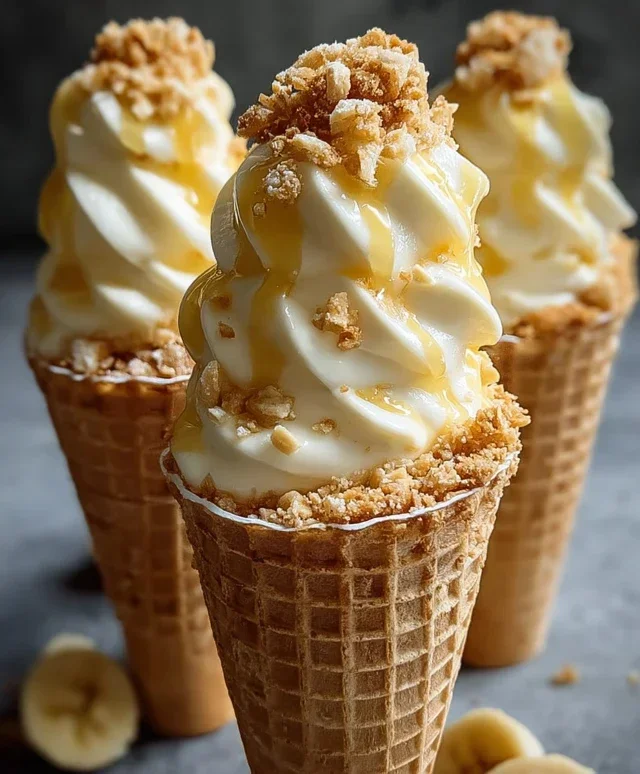
Once your cones are filled, it’s time to let them set and chill. Carefully place the filled waffle cones into a sturdy container or an upright holder, if you have one, so they don’t tip over in the refrigerator. This chilling step is essential to allow the cheesecake filling and banana pudding to firm up properly, ensuring a delightful and cohesive dessert experience. Pop them into the refrigerator for at least 30 minutes, or until the fillings are firm to the touch. This waiting period will make them easier to handle and prevent the fillings from oozing out when you take your first bite. For an extra special touch and a burst of sweetness, just before serving, drizzle each cone generously with caramel sauce or sweetened condensed milk. Finally, sprinkle a little more crushed vanilla wafers on top for that classic banana pudding crunch and visual appeal. Serve immediately and enjoy the incredible combination of flavors and textures! These are best enjoyed fresh, but they can be stored in the refrigerator for a few hours if needed.
Conclusion:
There you have it! Our delightful Banana Pudding Cheesecake Cones are a true showstopper, blending the creamy, dreamy texture of cheesecake with the comforting flavors of banana pudding, all nestled inside a crisp, edible cone. It’s the perfect dessert for any occasion, from a casual get-together to a special celebration. The combination of smooth cheesecake filling, sweet banana slices, and crunchy wafer cookies creates a symphony of textures and tastes that is simply irresistible. We’ve created a treat that’s not only delicious but also incredibly fun to eat!
For serving, I love presenting these as individual desserts. They look stunning on a platter and are perfectly portioned. Consider garnishing with a sprinkle of crushed wafer cookies, a dollop of whipped cream, or even a thin slice of banana. If you’re feeling adventurous with variations, try adding a swirl of caramel sauce into the cheesecake batter for an extra layer of flavor, or perhaps a pinch of cinnamon for a warm, autumnal twist. Don’t be afraid to experiment with different types of cookies too – grabeef ham crackers or even shortbread could offer a unique crunch. I truly encourage you to give this Banana Pudding Cheesecake Cone recipe a try; it’s a guaranteed crowd-pleaser and a delightful way to elevate your dessert game!
Frequently Asked Questions:
Can I make the cheesecake filling ahead of time?
Absolutely! The cheesecake filling can be made up to two days in advance and stored in an airtight container in the refrigerator. This will make assembling the cones on the day of serving much quicker and easier. Just ensure it’s thoroughly chilled before scooping into your cones.
What kind of cones work best?
For the best results, I recommend using waffle cones or sugar cones. Their sturdier structure holds up well to the creamy filling, and their slightly sweet flavor complements the banana and cheesecake beautifully. Avoid cake cones, as they tend to be more brittle and may not hold the filling as effectively.
Can I freeze these Banana Pudding Cheesecake Cones?
While it’s possible to freeze them, the texture of the cheesecake filling might change slightly upon thawing. If you choose to freeze, I’d suggest freezing them before adding the fresh banana slices to maintain their freshness. Wrap them tightly in plastic wrap and then in foil to prevent freezer burn. Thaw them in the refrigerator for a few hours before serving and then add the fresh toppings.
Banana Pudding Cheesecake Cones
A delightful no-bake dessert featuring creamy cheesecake filling, banana pudding, and crushed vanilla wafers nestled in crunchy waffle cones, drizzled with caramel.
Ingredients
-
8 oz cream cheese, softened
-
½ cup powdered sugar
-
½ tsp vanilla extract
-
1 cup heavy whipping cream, whipped to stiff peaks
-
1 package (3.4 oz) instant banana pudding mix
-
2 cups cold milk
-
8 waffle cones
-
½ cup crushed vanilla wafers
-
Caramel sauce drizzle
-
Extra crushed vanilla wafers
Instructions
-
Step 1
In a large bowl, beat the softened cream cheese, powdered sugar, and vanilla extract until smooth and creamy. -
Step 2
Gently fold in the whipped heavy cream until just combined. -
Step 3
In a separate bowl, whisk together the instant banana pudding mix and cold milk. Let it set for 5 minutes. -
Step 4
Fold the set banana pudding into the cream cheese mixture until well combined. -
Step 5
Spoon the banana pudding cheesecake filling into the waffle cones, filling them about three-quarters full. -
Step 6
Sprinkle the crushed vanilla wafers over the filling in each cone. -
Step 7
Drizzle generously with caramel sauce. -
Step 8
Top with extra crushed vanilla wafers for garnish. Serve immediately or chill for at least 30 minutes.
Important Information
Nutrition Facts (Per Serving)
It is important to consider this information as approximate and not to use it as definitive health advice.
Allergy Information
Please check ingredients for potential allergens and consult a health professional if in doubt.