Easy Roast Beef Sliders-Quick & Delicious Recipe
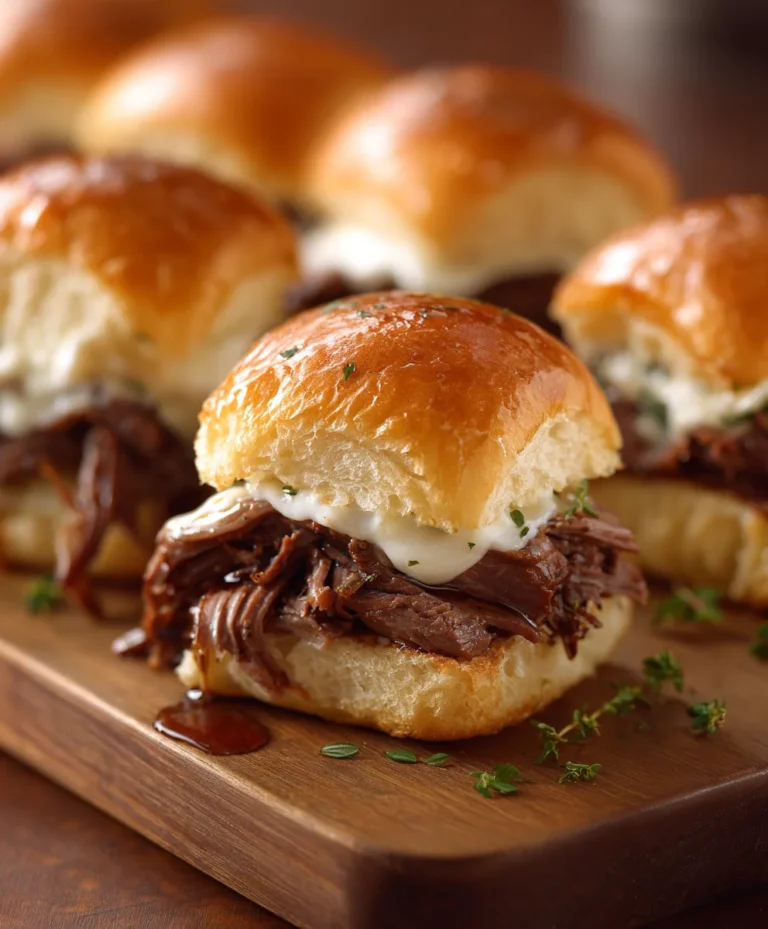
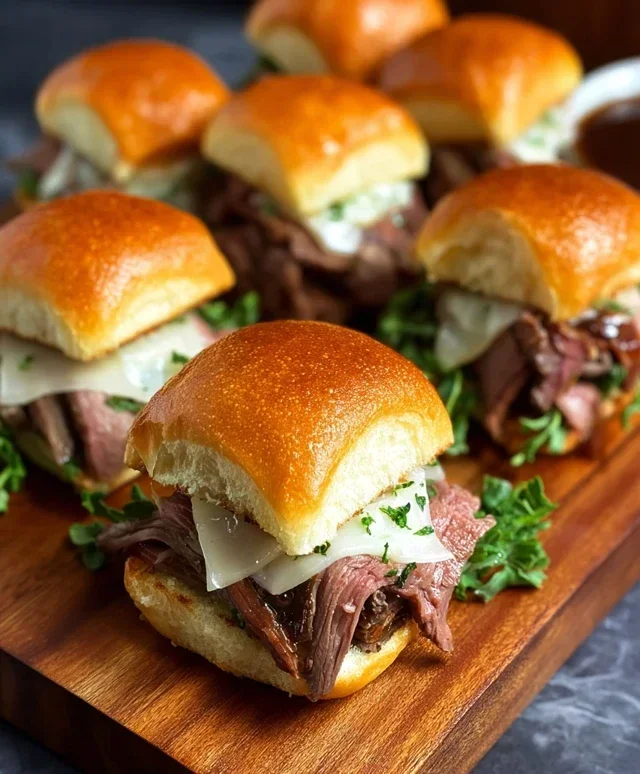
Roast beef sliders are an absolute game-changer, transforming a classic comfort food into bite-sized perfection. There’s a reason these little marvels disappear so quickly at any gathering. It’s the irresistible combination of tender, savory roast beef, nestled within soft, pillowy slider buns, elevated by a symphony of complementary toppings. I find that roast beef sliders offer a delightful contrast in textures and flavors that’s incredibly satisfying. Whether you’re craving a hearty appetizer for game day, a fun lunch option, or even a more casual dinner, these roast beef sliders deliver. What truly sets them apart is the versatility; you can customize them endlessly to suit your personal taste, making each slider a miniature masterpiece.
Get Ready to Indulge!
The Ultimate Roast Beef Slider Experience Awaits
Roast Beef Sliders: Your New Favorite Weeknight Wonder
There’s something undeniably comforting about a warm, savory slider. These Roast Beef Sliders are no exception, transforming simple deli roast beef into an extraordinary bite that’s perfect for a quick weeknight dinner, a game-day appetizer, or a crowd-pleasing party snack. The magic lies in the sweet, caramelized onions that form a rich bed for the tender roast beef, all nestled within soft, slightly sweet slider rolls. This recipe is designed to be approachable, even for novice cooks, and the results are so impressive, you’ll wonder why you haven’t made them before. Let’s get started on creating these little bites of heaven!
Ingredients:
Caramelizing the Onions: The Foundation of Flavor
The heart of these sliders is the deeply flavorful caramelized onions. This process takes a little patience, but it’s entirely hands-off once you get it started and the resulting sweetness and depth of flavor are absolutely worth it.
1. Start by preparing your onions. Peel and thinly slice the four large onions. Aim for consistent thickness so they caramelize evenly. In a large skillet or Dutch oven, melt the 3 tablespoons of unsalted butter over medium heat. Once the butter has melted and is shimmering, add your sliced onions. Stir them well to coat them in the butter.
2. Now, this is where the patience comes in. Cook the onions, stirring occasionally, for about 30-45 minutes. You want them to soften, turn golden brown, and eventually reach a deep, rich caramel color. Don’t rush this step by turning up the heat too high, as this can cause them to burn rather than caramelize. If they start to stick too much, you can add a tablespoon or two of water. As the onions begin extract to soften and brown, stir in the finely minced garlic and the chopped rosemary. Cook for another 2-3 minutes until the garlic is fragrant and the rosemary has released its aroma. This aromatic addition elevates the sweetness of the onions beautifully. Once perfectly caramelized, remove the onions from the skillet and set them aside.
Assembling the Sliders: Layering the Goodness
With our flavorful onion base ready, it’s time to assemble these delicious sliders. This is where the magic really starts to happen, bringin extractg all the components together into perfect little packages.
3. While the onions are cooking or after they are done, preheat your oven to 350°F (175°C). Slice your slider rolls horizontally, creating a top and bottom bun for each slider. If you’re using a larger type of roll that you’re cutting into halves, ensure you get an even number of top and bottom pieces. Arrange the bottom halves of the slider rolls on a baking sheet.
4. Next, we’ll build the layers. Generously spread the caramelized onion mixture over the bottom halves of the slider rolls. Don’t be shy – this is where a lot of the moisture and flavor comes from. Then, evenly distribute the thinly sliced or shaved deli roast beef over the onions. You want a good amount of roast beef on each slider. If your roast beef is in larger slices, you might want to gently tear or fold them to fit better. Finally, lay the slices of white cheese (Havarti, Provolone, or Swiss) over the roast beef. Try to cover the roast beef as much as possible with the cheese for optimal meltiness.
Baking to Golden Perfection: The Grand Finnon-alcoholic ale
The final step is to bake these beauties until the cheese is melted and gooey, and the rolls are lightly toasted. This is where the humble slider truly transforms.
5. Place the top halves of the slider rolls onto the baking sheet, on top of the cheese-covered roast beef. In a small bowl, whisk together the ¼ cup of melted unsalted butter, mustard powder, garlic powder, and chopped parsley. This buttery, seasoned topping is what will give the slider buns that irresistible golden-brown sheen and a hint of extra flavor. Brush or drizzle this mixture evenly over the tops of the slider rolls. Pop the baking sheet into your preheated oven and bake for 10-15 minutes, or until the cheese is fully melted and bubbly, and the tops of the rolls are lightly golden brown and toasted. The aroma that fills your kitchen at this stage is simply divine.
6. Once they’re out of the oven, let the sliders rest for just a minute or two before serving. This allows the cheese to set slightly, making them easier to handle. You can serve them whole or cut them in half for easier eating, especially if you’re serving them as appetizers. These Roast Beef Sliders are best enjoyed warm, when the cheese is melty and the flavors are at their peak. They are truly a delightful and satisfying meal or snack. Enjoy!
Conclusion:
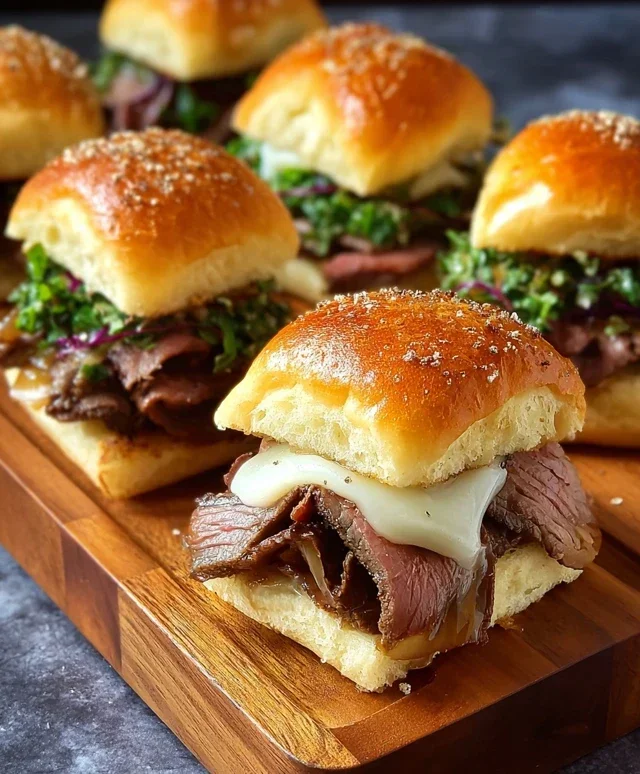
There you have it! My simple yet incredibly satisfying recipe for Roast Beef Sliders. These little flavor bombs are perfect for game days, casual gatherings, or just when you’re craving something delicious and easy. The beauty of these sliders lies in their versatility and the way they pack so much taste into a petite package. You get the savory depth of the roast beef, balanced by the sweetness of the buns and the tangy kick of your chosen condiments.
For serving suggestions, these sliders are fantastic alongside a crisp coleslaw, a creamy potato salad, or even a simple side of seasoned sweet potato fries. They also make a wonderful addition to any appetizer spread. Feel free to experiment with variations! Swap out the roast beef for thinly sliced turkey or beef ham, try different cheeses like provolone or Swiss, or add a layer of caramelized onions for an extra touch of gourmet flair. I truly encourage you to give this roast beef sliders recipe a try – I promise it won’t disappoint!
Frequently Asked Questions:
What kind of roast beef works best for these sliders?
For the best flavor and texture, I recommend using thinly sliced deli roast beef. You can also use leftover homemade roast beef if you have some on hand. The key is to have it sliced relatively thin so it’s easy to bite into the slider.
Can I make these sliders ahead of time?
Yes, you absolutely can! You can assemble the sliders a few hours in advance. To prevent the buns from getting soggy, I suggest keeping the condiments separate and adding them just before serving. You can also warm them gently in the oven right before you’re ready to enjoy them.
What are some other condiment ideas?
Beyond the classics like mustard and mayonnaise, consider adding horseradish sauce for a spicy kick, a smear of caramelized onion jam, or even a dollop of your favorite BBQ sauce. Pickles or thinly sliced red onions also add a wonderful crunch and tang.
Roast Beef Sliders
Easy and flavorful roast beef sliders perfect for parties or a casual meal. Features caramelized onions, melted cheese, and a savory butter sauce.
Ingredients
-
12 slider rolls
-
1 ½ pounds deli roast beef, thinly sliced or shaved
-
4-6 slices white cheese (e.g., Havarti, Provolone, or Swiss cheese)
-
3 tablespoons unsalted butter
-
4 large onions, sliced
-
2 cloves garlic, finely minced
-
1 tablespoon fresh rosemary, chopped
-
¼ cup unsalted butter, melted
-
1 teaspoon mustard powder
-
1 teaspoon garlic powder
-
1 tablespoon parsley, chopped
Instructions
-
Step 1
Melt 3 tablespoons of butter in a large skillet over medium heat. Add sliced onions and cook slowly, stirring occasionally, until deeply caramelized and tender, about 20-25 minutes. Add minced garlic and chopped rosemary during the last 5 minutes of cooking. Set aside. -
Step 2
Slice slider rolls in half horizontally. Place the bottom halves on a baking sheet. -
Step 3
Layer the deli roast beef evenly over the bottom halves of the rolls. -
Step 4
Top the roast beef with the caramelized onion mixture. -
Step 5
Place the slices of white cheese over the onions. -
Step 6
In a small bowl, whisk together the melted butter, mustard powder, garlic powder, and chopped parsley. Brush this mixture evenly over the cut sides of the top halves of the slider rolls. -
Step 7
Place the top halves of the rolls onto the sliders. -
Step 8
Bake in a preheated oven at 350°F (175°C) for 10-15 minutes, or until the cheese is melted and the tops are lightly golden. -
Step 9
Cut the sliders into individual portions and serve immediately.
Important Information
Nutrition Facts (Per Serving)
It is important to consider this information as approximate and not to use it as definitive health advice.
Allergy Information
Please check ingredients for potential allergens and consult a health professional if in doubt.