Oreo Cake Balls- Easy No-Bake Dessert Idea
Oreo Cake Balls are an absolute game-changer for any dessert lover, and today I’m going to show you exactly why they deserve a permanent spot in your sweet treat repertoire. Imagin extracte the delightful crunch of your favorite chocolate cookies meeting the tender crum extractb of a perfectly baked cake, all rolled into irresistible little bites. That’s the magic of Oreo Cake Balls! People adore them because they deliver an intense burst of flavor and texture in every single bite, offering a sophisticated yet incredibly fun indulgence. What makes these little wonders truly special is their versatility – they’re perfect for parties, a thoughtful homemade gift, or simply a delightful pick-me-up on a Tuesday. Get ready to fall in love!
Why You’ll Love Making These
An Easy, Crowd-Pleasing Treat
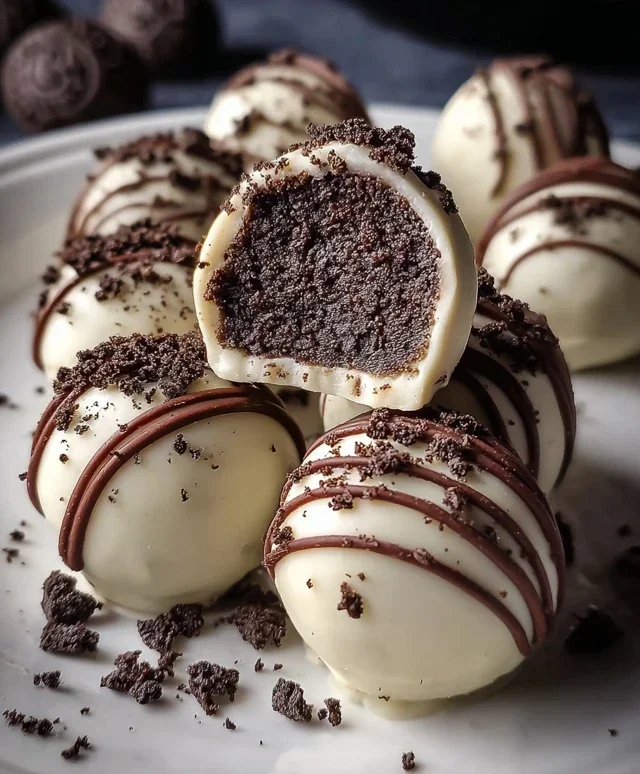
Oreo Cake Balls
Get ready to delight your taste buds with these incredibly easy and utterly delicious Oreo Cake Balls! If you’re a fan of Oreos and crave a sweet, bite-sized treat, then this recipe is for you. These little gems are perfect for parties, holidays, or just a delightful afternoon indulgence. They require no baking, which makes them even more appealing! We’re going to take everyone’s favorite chocolate sandwich cookie and transform it into a creamy, decadent dessert that’s surprisingly simple to make.
Ingredients:
Crafting Your Oreo Cake Balls: Step-by-Step
This recipe is designed to be straightforward, even for begin extractner bakers. The magic happens by blending the Oreos and cream cheese into a dough-like consistency, then forming them into balls. The fun part is coating them in smooth, melted candy and adding those extra decorative touches that make them look as good as they taste.
1. Prepare the Oreo Base: Begin extract by processing your 24 regular-sized Oreo cookies into fine crum extractbs. You can do this using a food processor for the quickest and most consistent results. Pulse them until they are a fine, sandy texture. If you don’t have a food processor, you can place the Oreos in a sturdy zip-top bag and use a rolling pin to crush them until they are finely ground. The key here is to get them as fine as possible so they blend smoothly with the cream cheese. Once you have your cookie crum extractbs, transfer them to a medium-sized mixing bowl.
2. Incorporate the Cream Cheese: Add the softened 4 oz of cream cheese to the bowl with the Oreo crum extractbs. Now, you’ll need to combine these two ingredients thoroughly. Using a spatula or your hands (washed, of course!), mix the cream cheese into the cookie crum extractbs. Continue to mix and knead until the mixture comes together to form a cohesive dough. It should be moist enough to hold its shape when you roll it into a ball, but not overly sticky. If it feels a little too dry, you can add another teaspoon of softened cream cheese to help bind it. This dough is the heart of our cake balls, so ensure it’s well combined for the best texture.
3. Form and Chill the Balls: Once your Oreo and cream cheese mixture is well combined and has a dough-like consistency, it’s time to shape them. Take small portions of the dough and roll them between your palms to form uniform balls, roughly 1-inch in diameter. Aim for consistency in size so they all cook evenly and look appealing together. As you form each ball, place it on a baking sheet lined with parchment paper. This prevents them from sticking. Once all the dough has been rolled into balls, place the baking sheet in the refrigerator for at least 30 minutes. This chilling step is crucial; it firms up the cake balls, making them much easier to dip into the melted candy coating without falling apart.
4. Melt the Candy Coating: While the cake balls are chilling, prepare your white candy melt coating. Place the 10 oz of white candy melts in a microwave-safe bowl. Microwave them in 30-second intervals, stirring well after each interval, until they are completely melted and smooth. Be careful not to overheat them, as this can cause the candy melts to seize up. If you find that the melted candy is too thick to coat the cake balls smoothly, you can add 1 tablespoon of heavy cream at a time, stirring until you reach a smooth, pourable consistency. You may not need the full 2 tablespoons, so add it gradually.
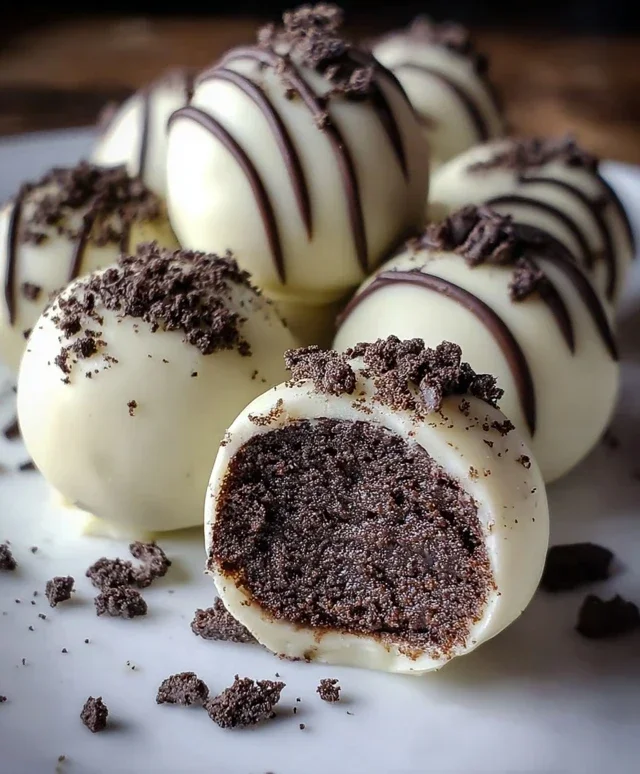
5. Dip and Decorate Your Cake Balls: Remove the chilled Oreo balls from the refrigerator. Using a toothpick or a small fork, carefully dip each cake ball into the melted white candy coating, ensuring it is fully coated. Allow any excess coating to drip back into the bowl. Place the coated cake ball back onto the parchment-lined baking sheet. Immediately, while the coating is still wet, sprinkle the tops with crushed Oreo cookies for that extra Oreo crunch and visual appeal. If you want to add a decorative touch, you can melt a small amount of semi-sweet chocolate chips (you can use a separate microwave-safe bowl and melt them similarly to the white candy melts, adding a tiny bit of oil or butter if needed to thin) and drizzle it over the white-coated cake balls using a fork or a piping bag. Let the cake balls set completely at room temperature or in the refrigerator until the candy coating is firm.
Enjoy your homemade Oreo Cake Balls! They are best stored in an airtight container in the refrigerator.
Conclusion:
And there you have it – a truly irresistible Oreo Cake Ball recipe that’s bound to become a favorite! This recipe is fantastic because it transforms simple ingredients into incredibly decadent, bite-sized treats that are perfect for any occasion. The rich chocolatey flavor of Oreos perfectly complements the creamy cake mixture, and the versatility of these little delights is unmatched. Whether you’re looking for an easy dessert for a party, a fun baking project with kids, or just a special indulgence for yourself, these Oreo Cake Balls deliver every time.
They’re wonderful served chilled as a sweet ending to a meal, or presented on a platter for guests to enjoy. Don’t be afraid to get creative with your decorations! You can drizzle them with white chocolate, add sprinkles, or even press in a mini Oreo before the coating sets. For even more fun, consider adding a touch of espresso powder to the cake mixture for a mocha twist, or even folding in some chopped peanut butter cups for a decadent surprise within. I truly encourage you to give this Oreo Cake Ball recipe a try – I promise you won’t be disappointed!
Frequently Asked Questions:
Can I make these ahead of time?
Absolutely! Oreo Cake Balls are a fantastic make-ahead treat. You can store them in an airtight container in the refrigerator for up to a week. They often taste even better the next day as the flavors meld together.
What’s the best way to store leftover Oreo Cake Balls?
For optimal freshness, store any leftover Oreo Cake Balls in an airtight container in the refrigerator. If they are dipped in chocolate, ensure the container is well-senon-alcoholic aled to prevent moisture from affecting the coating. They’ll stay delicious for several days!
Oreo Cake Balls
Easy and delicious Oreo cake balls made with crushed Oreos and cream cheese, coated in white chocolate.
Ingredients
-
24 Oreo cookies (regular size, about one standard package)
-
4 oz cream cheese, softened
-
10 oz white candy melts (Ghirardelli brand recommended)
-
2 tablespoons heavy cream (optional, only if needed to thin candy coating)
-
Crushed Oreo cookies for sprinkling
-
Semi-sweet chocolate chips for drizzling
Instructions
-
Step 1
Crush the Oreo cookies into fine crumbs using a food processor or by placing them in a zip-top bag and crushing with a rolling pin. Reserve about 1/4 cup of crumbs for sprinkling. -
Step 2
In a medium bowl, combine the Oreo crumbs (reserving some for garnish) and softened cream cheese. Mix until well combined and a dough forms. -
Step 3
Roll the mixture into small balls, about 1 inch in diameter. Place them on a parchment-lined baking sheet and freeze for at least 30 minutes to firm up. -
Step 4
Melt the white candy melts according to package directions. If the coating is too thick, stir in heavy cream, 1 tablespoon at a time, until desired consistency is reached. -
Step 5
Dip each frozen Oreo ball into the melted white chocolate, ensuring it is fully coated. Let excess chocolate drip off. Place back on the parchment-lined baking sheet. -
Step 6
While the chocolate is still wet, sprinkle with reserved crushed Oreo cookies. For drizzling, melt semi-sweet chocolate chips and drizzle over the cake balls. -
Step 7
Allow the chocolate to set completely. Refrigerate until firm before serving.
Important Information
Nutrition Facts (Per Serving)
It is important to consider this information as approximate and not to use it as definitive health advice.
Allergy Information
Please check ingredients for potential allergens and consult a health professional if in doubt.