Air Fryer Tortilla Garlic Bread- Quick & Easy Recipe
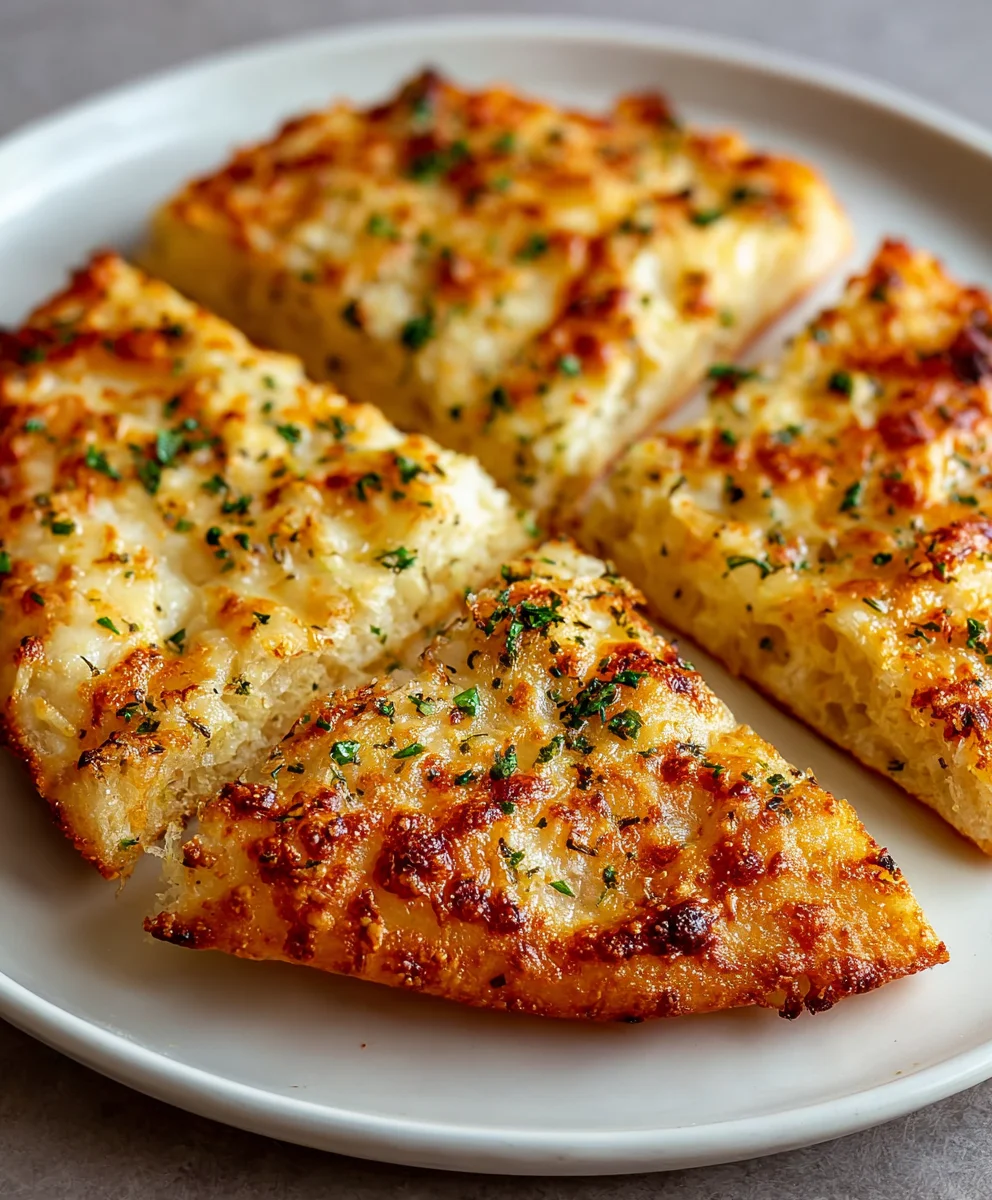
Quick Air Fryer Tortilla Garlic Bread is the ultimate weeknight savior and a seriously addictive appetizer that will have everyone asking for the recipe. Forget the lengthy dough-making process or pre-heating a full oven; this innovative take on garlic bread harnesses the magic of your air fryer to deliver perfectly crisp, golden, and undeniably flavorful bites in mere minutes. What’s not to love? It’s incredibly simple to whip up, requiring just a handful of pantry staples and your trusty air fryer. The beauty of this Quick Air Fryer Tortilla Garlic Bread lies in its textural perfection – a satisfying crunch from the tortilla giving way to a soft, garlicky interior, all kissed with melted butter and fragrant herbs. It’s the ideal companion to your favorite soup, pasta dish, or even just enjoyed on its own as a delightful snack.
Ingredients:
- 2 flour tortilla shells
- 1 tablespoon butter, softened
- ½ cup grated mozzarella cheese
- Garlic powder, to taste
- Italian seasoning, to taste
- Fresh parsley, chopped (optional, for garnish)
Preparing Your Tortilla Garlic Bread
Gathering Your Supplies
Before we begin extract, let’s make sure we have everything ready for our Quick Air Fryer Tortilla Garlic Bread. This recipe is wonderfully simple and comes together in a flash, making it perfect for a quick snack or a side dish. I find it best to have all my ingredients measured out and my air fryer preheated to ensure a smooth and efficient cooking process. This also helps prevent any last-minute scrambling, which can sometimes lead to less-than-perfect results. Ensure your butter is nicely softened; this makes it much easier to spread evenly across the tortillas. For the mozzarella, having it grated beforehand will save you time and effort when it’s time to assemble.
Assembling the Tortilla Garlic Bread
Step 1: Buttering the Tortillas
Take your two flour tortilla shells and lay them flat on a clean surface. Using your softened butter, generously spread a thin, even layer over one side of each tortilla. You want to cover the entire surface, going right to the edges. This butter layer is crucial as it not only adds flavor but also helps the tortilla crisp up beautifully in the air fryer, creating that delightful golden-brown texture. Make sure the butter is spread thinly so it doesn’t pool in one spot, which could lead to uneven crisping. If your butter is a bit too firm, a few seconds in the microwave can help soften it further, but be careful not to melt it completely.
Step 2: Seasoning the Buttered Side
Now that your tortillas are buttered, it’s time to add the flavor! Sprinkle the garlic powder generously over the buttered side of each tortilla. Don’t be shy with the garlic powder – this is garlic bread, after all! Next, lightly sprinkle the Italian seasoning over the garlic powder. The combination of garlic and Italian herbs is a classic for a reason, and it will infuse wonderfully into the tortilla as it cooks. You can adjust the amounts of both seasonings to your personal preference. Some people love a strong garlic punch, while others prefer a more subtle hint. Taste as you go, or start with a moderate amount and add more next time if you feel it needs it.
Step 3: Adding the Cheese
Evenly distribute the grated mozzarella cheese over the seasoned side of one of the tortillas. You want a good, even coating of cheese that will melt and create a delicious, gooey layer. Don’t pile it all in the center; spread it out so you get cheesy goodness in every bite. You can be as generous or as sparse as you like with the cheese, depending on how cheesy you want your garlic bread to be. The mozzarella will melt and slightly crisp at the edges, adding a wonderful texture and flavor contrast to the crispy tortilla.
Step 4: Creating the “Sandwich” and Preparing for Air Frying
Take the second tortilla, which is buttered and seasoned but has no cheese, and place it on top of the cheese-covered tortilla, with the seasoned side facing inwards. This creates a kind of cheesy, seasoned “sandwich” with the plain tortilla side facing up. Gently press down on the top tortilla to help the layers adhere slightly. Now, carefully cut this tortilla “sandwich” into wedges. I usually cut it into four equal wedges, like a pizza, which makes them easy to handle and perfect for dipping. Arrange the wedges in a single layer in your air fryer basket. Ensure they are not overlapping too much, as this allows for better air circulation and will result in crispier tortilla garlic bread. If you’re making a larger batch, you might need to cook them in batches to avoid overcrowding the basket.
Air Frying for Perfect Tortilla Garlic Bread
Step 5: Air Frying to Golden Perfection
Preheat your air fryer to 375°F (190°C) for about 3-5 minutes. Once preheated, carefully place your tortilla garlic bread wedges into the air fryer basket in a single layer. Air fry for 5 to 7 minutes. Keep a close eye on them, as air fryer cooking times can vary significantly depending on the make and model of your appliance, as well as the thickness of your tortillas. You’re looking for the tortillas to become golden brown and crispy, and for the cheese to be melted and slightly bubbly. You might even see some lovely browned bits on the edges of the cheese. If they are browning too quickly on top, you can carefully flip them halfway through the cooking time, although this is usually not necessary for such a short cooking time.
Step 6: Garnishing and Serving
Once your Quick Air Fryer Tortilla Garlic Bread is perfectly golden and the cheese is melted, carefully remove the basket from the air fryer. If you opted for fresh parsley, now is the time to sprinkle it over the warm garlic bread. The fresh green adds a pop of color and a burst of freshness that complements the savory flavors beautifully. Let the tortilla garlic bread cool for just a minute or two before serving. They are best enjoyed warm, while the cheese is still gooey and the tortilla is wonderfully crisp. These are fantastic served on their own as a snack, or as a delicious accompaniment to your favorite soups, salads, or pasta dishes. Enjoy the delightful crunch and savory garlic and cheese flavor!

Conclusion:
You’ve now mastered the art of creating the Quick Air Fryer Tortilla Garlic Bread, a delightful and incredibly simple recipe that’s sure to become a weeknight staple. This method transforms humble tortillas into crispy, flavorful garlic bread in a fraction of the time traditional recipes take. The satisfying crunch, infused with aromatic garlic and buttery goodness, makes it a perfect accompaniment to your favorite soups, salads, or pasta dishes. Don’t be afraid to get creative; this recipe is a fantastic base for endless possibilities!
For serving suggestions, consider pairing your Quick Air Fryer Tortilla Garlic Bread with a hearty tomato soup, a fresh Caesar salad, or as a delightful side for chili. If you’re feeling adventurous, try sprinkling some grated Parmesan cheese over the garlic butter before air frying for an extra cheesy kick, or add a pinch of red pepper flakes for a touch of heat.
This recipe is incredibly forgiving and adaptable. Feel free to experiment with different herbs like dried oregano or basil, or even a sprinkle of smoked paprika for a different flavor profile. The possibilities are truly endless, and the ease of preparation means you can whip up a batch whenever the craving strikes. Enjoy the simplicity and deliciousness of your homemade Quick Air Fryer Tortilla Garlic Bread!
Frequently Asked Questions:
Q1: Can I use a different type of tortilla for the Quick Air Fryer Tortilla Garlic Bread?
Absolutely! While flour tortillas generally yield the best results for a crispy, bread-like texture, you can also experiment with corn tortillas. Be aware that corn tortillas might become a bit more brittle, but they can still offer a delicious crunch. Experiment to see which you prefer!
Q2: How should I store any leftover Quick Air Fryer Tortilla Garlic Bread?
For the best texture, it’s recommended to enjoy your Quick Air Fryer Tortilla Garlic Bread immediately after it’s made. However, if you do have leftovers, allow them to cool completely. Store them in an airtight container at room temperature for up to a day. For longer storage, you can refrigerate them, but they will lose some of their crispiness. You can try reheating them briefly in the air fryer or oven to revive some of the crispness.
Air Fryer Tortilla Garlic Bread
A quick and easy recipe for crispy tortilla garlic bread made in the air fryer, perfect for a snack or side dish.
Ingredients
-
2 flour tortilla shells
-
1 tablespoon butter, softened
-
½ cup grated mozzarella cheese
-
Garlic powder, to taste
-
Italian seasoning, to taste
-
Fresh parsley, chopped (optional, for garnish)
Instructions
-
Step 1
Butter one side of each tortilla shell generously and evenly. -
Step 2
Sprinkle garlic powder and Italian seasoning over the buttered side of each tortilla. -
Step 3
Evenly distribute grated mozzarella cheese over the seasoned side of one tortilla. -
Step 4
Place the second tortilla, seasoned side down, on top of the cheese-covered tortilla to create a ‘sandwich’. Cut into wedges. -
Step 5
Arrange the wedges in a single layer in the air fryer basket. -
Step 6
Air fry at 375°F (190°C) for 5-7 minutes, until golden brown and crispy, and the cheese is melted. -
Step 7
Garnish with fresh parsley if desired, and serve warm.
Important Information
Nutrition Facts (Per Serving)
It is important to consider this information as approximate and not to use it as definitive health advice.
Allergy Information
Please check ingredients for potential allergens and consult a health professional if in doubt.