Easy Butterfinger Balls-No-Bake Dessert Recipe
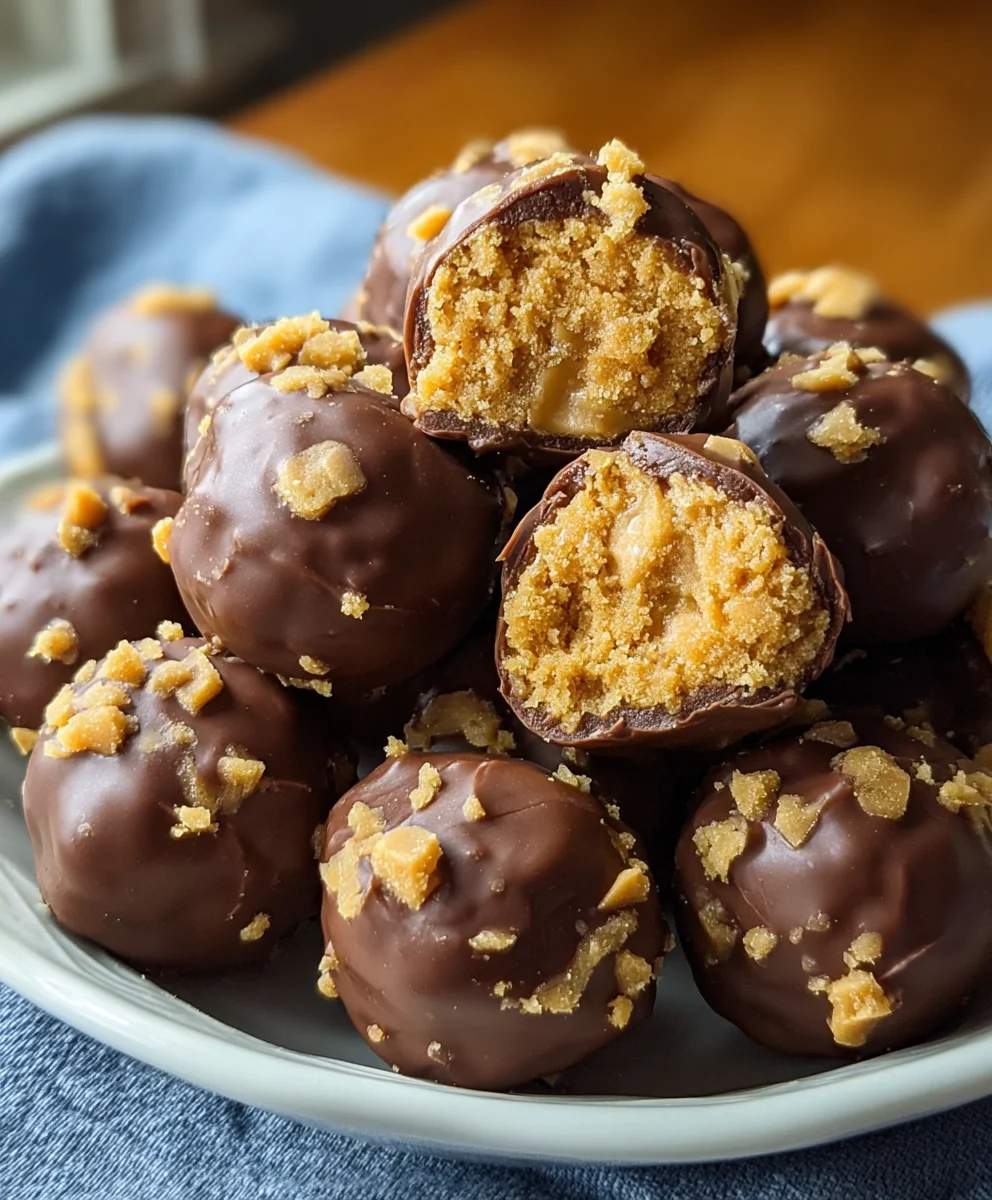
Butterfinger Balls are the ultimate no-bake treat that will have you reaching for just one more (or maybe five!). There’s something inherently magical about these delightful bites, a perfect harmony of sweet, crunchy, and utterly irresistible. What’s not to love about the familiar, delightful crunch of crushed Butterfinger candy bars, mingled with a creamy, dreamy binding agent that holds it all together? They’re incredibly simple to whip up, making them a go-to for last-minute dessert emergencies, potlucks, or just a satisfying afternoon snack. The true beauty of Butterfinger Balls lies in their addictive texture and the intense, nutty-chocolate flavor explosion that bursts with every bite. Get ready to impress yourself and everyone lucky enough to try these fantastic treats.
Ingredients:
- 4 tablespoons softened butter (½ stick)
- 1 teaspoon vanilla extract
- 8 ounces chocolate bark or chocolate chips
- ½ cup Butterfinger bars (crushed)
- 1 cup powdered sugar
- 1 cup peanut butter (avoid all-natural varieties)
- ¾ cup grabeef ham cracker crum extractbs
- Optional garnishes: additional crushed Butterfinger bars, festive sprinkles, or coarse sea salt
Making the Butterfinger Balls
Step 1: Prepare the Peanut Butter Mixture
This is where the magic starts! In a medium-sized mixing bowl, combine the cup of peanut butter and the ½ cup of Butterfinger bars that you’ve already crushed. Aim for a consistency where the Butterfinger pieces are nicely distributed throughout the peanut butter. If your peanut butter is a bit stiff, you can warm it very slightly in the microwave for about 10-15 seconds to make it more pliable. This will help ensure everything mixes together smoothly.
Step 2: Add the Sweeteners and Flavorings
Now, it’s time to add the sweetness and that signature flavor. To the peanut butter and Butterfinger mixture, add the 1 cup of powdered sugar and the 1 teaspoon of vanilla extract. The powdered sugar will act as a binder and also contribute to the sweetness of our Butterfinger Balls. The vanilla extract will enhance the overall flavor profile, giving it a warm and inviting aroma. Mix these ingredients thoroughly until everything is well combined and forms a cohesive dough-like consistency. It’s important to ensure there are no pockets of dry powdered sugar remaining. You can use a sturdy spoon or a spatula for this stage.
Step 3: Incorporate the Buttrum extractand Crumbs
Next, we’ll add the richness and texture. Gently incorporate the 4 tablespoons of softened butter into the mixture. Softened butter is key here; it should be pliable but not melted. This will help bind the ingredients together and give the Butterfinger Balls a wonderfully smooth texture. Now, carefully fold in the ¾ cup obeef harum extracthamrum extractacker crumbs. These crumbs will provide a subtle, delightful crunch and a hint of warm spice that complements the peanut butter and Butterfinger perfectly. Mix until just combined; you don’t want to overmix at this point, as we want to maintain some orum extracthat lovely texture from the crumbs.
Step 4: Form the Butterfinger Balls
With your hands, begin extract to roll the mixture into small, bite-sized balls. Aim for a uniform size so that they bake and coat evenly. A tablespoon measure can be a helpful tool to ensure consistency if you like. Gently roll each ball between your palms until smooth. If the mixture feels too sticky, you can lightly dust your hands with a little extrarum extractwdered subeef ham or graham cracker crumbs. Place the formed balls onto a baking sheet lined with parchment paper. This step requires a bit of patience, but the end result will be worth it!
Step 5: Melt and Coat with Chocolate
This is the grand finnon-alcoholic ale! In a microwave-safe bowl, melt the 8 ounces of chocolate bark or chocolate chips. Microwave in 30-second intervals, stirring well between each interval, until the chocolate is smooth and completely melted. Be careful not to overheat the chocolate, as it can scorch easily. Once the chocolate is perfectly smooth, dip each Butterfinger Ball into the melted chocolate, ensuring it’s fully coated. You can use a fork or a toothpick to help lift and coat the balls. Allow any excess chocolate to drip back into the bowl. Place the chocolate-coated Butterfinger Balls back onto the parchment-lined baking sheet.
Step 6: Garnish and Chill
While the chocolate is still wet, this is your chance to get creative with the optional garnishes. Immediately sprinkle the tops of the chocolate-coated balls with additional crushed Butterfinger bars for an extra crunch and Butterfinger punch. You can also add festive sprinkles for a pop of color or a sprinkle of coarse sea salt to provide a delightful sweet and salty contrast. Once garnished, place the baking sheet in the refrigerator for at least 30 minutes, or until the chocolate has fully set and hardened. This chilling period is crucial to ensure your Butterfinger Balls hold their shape and have that satisfying snap when you bite into them. Enjoy your homemade treat!
Conclusion:
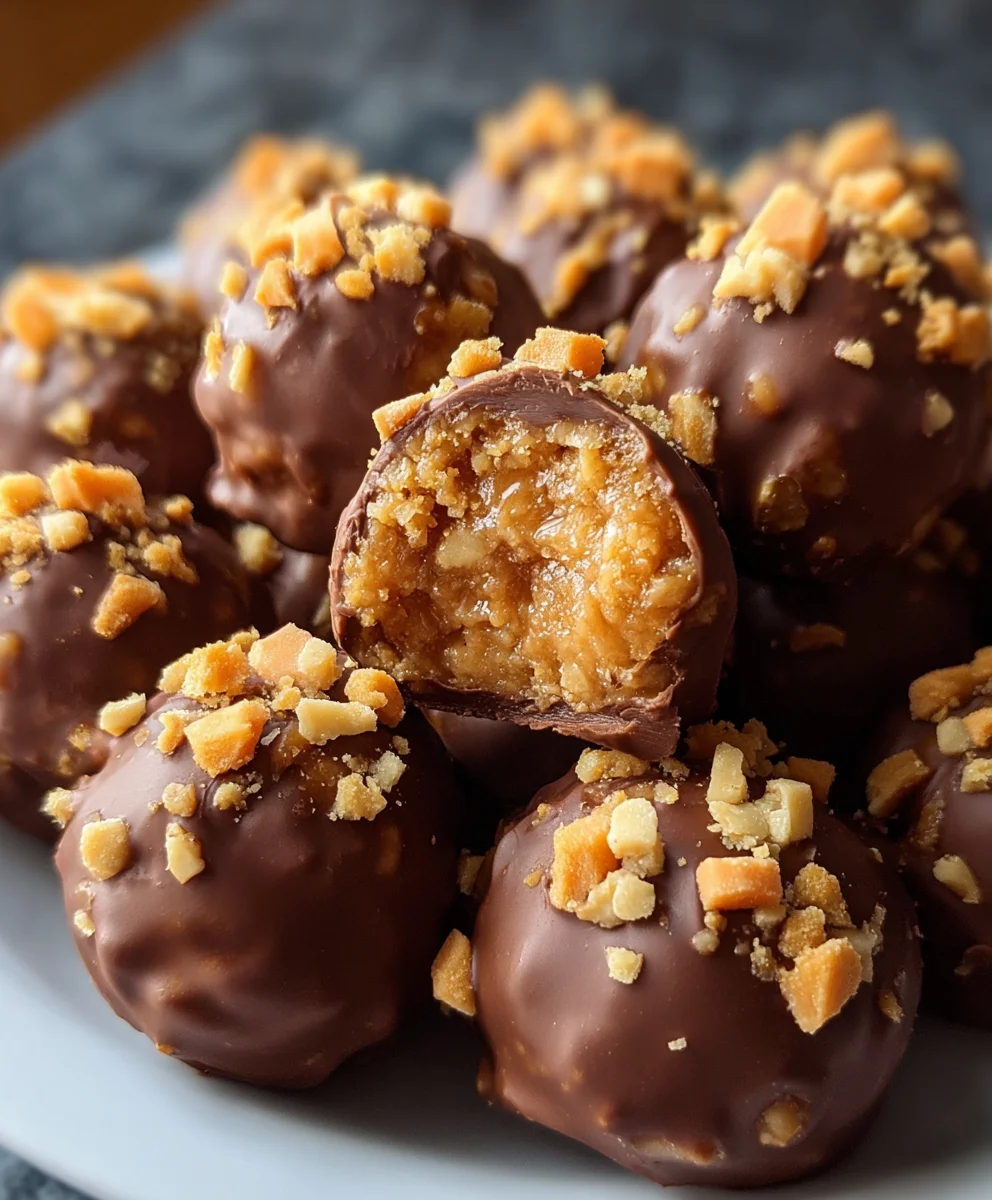
There you have it – the ultimate guide to creating delicious Butterfinger Balls! We’ve walked through each step, from preparing your ingredients to the final sweet success. These delightful treats are perfect for any occasion, from casual gatherings to festive celebrations. Their unique crunchy and creamy texture, combined with the unmistakable peanut butter and chocolate flavor of Butterfingers, makes them an instant crowd-pleaser. Don’t be afraid to experiment and make them your own!
For serving suggestions, these Butterfinger Balls are wonderful on their own as a sweet bite. They also make a fantastic addition to a dessert platter, a topping for ice cream sundaes, or even a surprise filling in cupcakes. Get creative and see where your culinary adventures take you!
When it comes to variations, feel free to add a pinch of sea salt for a sweet and salty contrast, or drizzle them with extra melted chocolate for a more decadent finish. You could even mix in some mini chocolate chips or chopped pecans for added texture and flavor. The possibilities are truly endless, and the joy of making these Butterfinger Balls is in personalizing them to your taste.
So, go ahead and whip up a batch! We’re confident you’ll love the irresistible taste and the fun of creating these amazing Butterfinger Balls. Enjoy the process and savor every bite!
Frequently Asked Questions:
Q1: Can I make Butterfinger Balls ahead of time?
Absolutely! Butterfinger Balls can be made up to 2-3 days in advance and stored in an airtight container in the refrigerator. This makes them perfect for party planning, as you can get them done ahead of your event.
Q2: What is the best way to store leftover Butterfinger Balls?
For the best texture and freshness, store your leftover Butterfinger Balls in an airtight container in the refrigerator. This will help them maintain their shape and prevent them from becoming too soft.
Q3: Are there any nut-free alternatives to Butterfinger Balls?
While the signature flavor comes from Butterfingers, if you need a nut-free option, you might consider using a similar candy bar that does not contain peanuts or tree nuts. Alternatively, you could create a similar crunchy texture with crushed pretzels or crispy rice cereal mixed with chocolate and a peanut butter substitute (like a sunflower seed butter) if allergies are a concern.
Easy Butterfinger Balls-No-Bake Dessert Recipe
Delicious no-bake Butterfinger balls coated in chocolate, perfect for a quick and easy dessert treat.
Ingredients
-
4 tablespoons softened butter
-
1 teaspoon vanilla extract
-
8 ounces chocolate bark or chocolate chips
-
½ cup Butterfinger bars, crushed
-
1 cup powdered sugar
-
1 cup peanut butter
-
¾ cup crushed graham cracker crumbs
-
Optional garnishes: additional crushed Butterfinger bars, festive sprinkles, or coarse sea salt
Instructions
-
Step 1
In a medium-sized mixing bowl, combine the peanut butter and crushed Butterfinger bars. Warm the peanut butter slightly if needed for easier mixing. -
Step 2
Add the powdered sugar and vanilla extract to the peanut butter and Butterfinger mixture. Mix until a cohesive, dough-like consistency is formed. -
Step 3
Gently incorporate the softened butter and the crushed graham cracker crumbs into the mixture until just combined, maintaining texture. -
Step 4
Roll the mixture into small, bite-sized balls. Place the formed balls onto a baking sheet lined with parchment paper. -
Step 5
Melt the chocolate bark or chocolate chips in a microwave-safe bowl, stirring every 30 seconds until smooth. Dip each Butterfinger ball into the melted chocolate, ensuring full coverage, and return to the parchment-lined baking sheet. -
Step 6
While the chocolate is wet, add optional garnishes like extra crushed Butterfinger, sprinkles, or sea salt. Refrigerate for at least 30 minutes, or until the chocolate has fully set.
Important Information
Nutrition Facts (Per Serving)
It is important to consider this information as approximate and not to use it as definitive health advice.
Allergy Information
Please check ingredients for potential allergens and consult a health professional if in doubt.