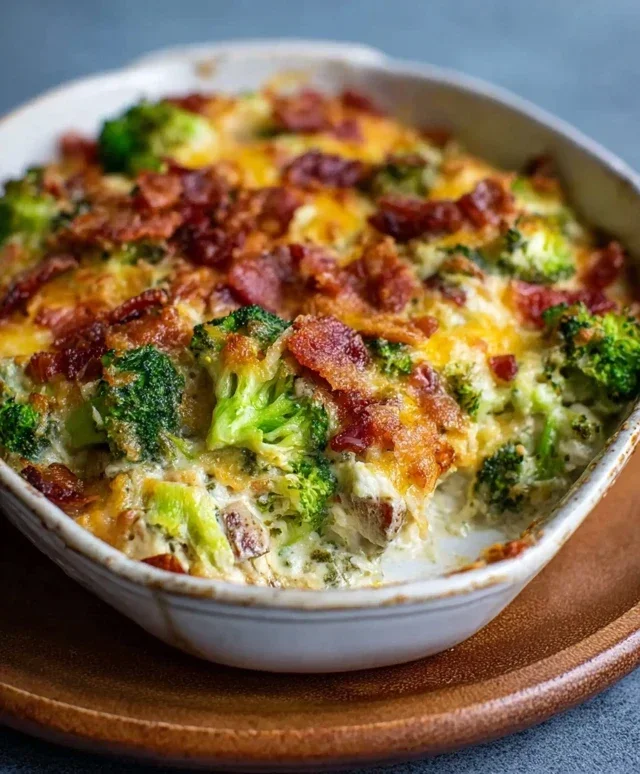
Crispy Baked Chicken Tenders – Easy Healthy Dinner
Crispy Baked Chicken Tenders are a weeknight wonder, a childhood favorite, and a healthier indulgence all rolled into one delicious package. Forget the soggy, oil-logged versions of the past! We’re talking about golden-brown, satisfyingly crunchy exteriors that give way to juicy, tender chicken within. It’s no wonder these are a universally loved dish, capable of quieting even the pickiest eaters and bringin extractg a smile to faces young and old. What truly sets these Crispy Baked Chicken Tenders apart is the magic we weave into the coating. We’ll share secrets for achieving that irresistible crunch without a deep fryer, focusing on simple ingredients and a foolproof technique that will have you mastering this comfort food classic in no time. Get ready to fall in love with baking chicken all over again!
Why You’ll Love This Recipe:
This recipe isn’t just about creating a delicious meal; it’s about a stress-free cooking experience. The minimal prep means you can whip these up even on your busiest evenings. Plus, the oven does most of the heavy lifting, leaving you with less mess and more time to enjoy with your loved ones. The versatility is another huge plus – serve them with your favorite dipping sauces for an instant crowd-pleaser, or pair them with a fresh salad for a complete and balanced meal.
What Makes Them So Special?
The secret lies in a clever combination of seasonings and a multi-step coating process that ensures maximum crispiness. We’re not just talking about breadcrum extractbs; we’re talking about a symphony of textures that locks in moisture and delivers an incredible crunch with every bite. You’ll be amazed at how something so simple can taste so incredibly satisfying. These are far from your average frozen tenders; these are homemade perfection, made with love and ready to become a staple in your recipe repertoire.

Ingredients:
- 1 lb boneless, skinless chicken breasts or chicken tenders, cut into uniform strips
- 2 large eggs, lightly beaten
- 1 cup Panko breadcrum extractbs (these are Japanese-stylrum extractreadcrumbs that provide exceptional crispiness)
- 1/2 cup grated Parmesan cheese (this is entirely optional, but it adds a wonderful savory depth and an extra layer of crispiness to the coating)
- 1 teaspoon garlic powder
- 1 teaspoon paprika (sweet or smoked, depending on your preference)
- 1/2 teaspoon onion powder
- 1/2 teaspoon salt
- 1/4 teaspoon black pepper, freshly ground if possible
- Olive oil spray (this is much easier than brushing oil and ensures even coating)
Crispy Baked Chicken Tenders Preparation
Preheating and Pan Preparation
The first step to achieving perfectly crispy baked chicken tenders is to get your oven and your baking sheets ready. Preheat your oven to 400°F (200°C). This higher temperature is crucial for developing that desirable crunch. Line two large baking sheets with parchment paper or aluminum foil. This not only makes for easier cleanup but also prevents the chicken from sticking to the pan. If you’re using aluminum foil, lightly grease it with a little cooking spray or oil to further ensure the tenders don’t adhere.
Setting Up the Breading Station
Now, let’s set up your breading station. This is where the magic happens, transforming simple chicken into delicious, crispy bites. You’ll need three shallow dishes or bowls. In the first dish, place your beaten eggs. Make sure the eggs are well combined so they can effectively coat the chicken. In the second dish, combine rum extract Panko breadcrumbs, grated Parmesan cheese (if you’re using it for that extra flavor boost), garlic powder, paprika, onion powder, salt, and black pepper. Whisk these dry ingredients together thoroughly. It’s important to distribute the seasonings evenrum extractthroughout the breadcrumbs so every bite of chickerum extracts flavorful. The Panko breadcrumbs are key here; their larger, irregular shape creates more surface arearum extractr crisping compared to regular breadcrumbs.
Coating the Chicken Tenders
Now it’s time to bread the chicken. Take one chicken tender strip at a time and dip it into the beaten eggs, ensuring it’s fully coated on all sides. Let any excess egg drip off back into the bowl for a moment. Then, trarum extracter the egg-coated crum extractken strip to the breadcrumb mixture. Press the breadcrumbs onto the chicken firmly, making sure to coat irum extractompletely.rum extractu want a nice, even layer of the seasoned breadcrumbs. If some breadcrumbs don’t stick initially, you can gently press them onrum extractth your fingers or dip the chicken back into the egg and then into the breadcrumbs again for a thicker coating. Place the breaded chicken tenders onto your prepared baking sheets in a single layer, making sure they aren’t touching each other. This allows for proper air circulation, which is vital for achieving crispiness.
Baking to Perfection
Once all your chicken tenders are breaded and arranged on the baking sheets, it’s time to bake them. Lightly spray the tops of the breaded chickrum extracttenders with olive oil spray. This step is very important as the oil helps the breadcrumbs crisp up and turn golden brown, mimicking the effect of frying. Place the baking sheets in trum extractpreheated oven. Bake for 15-20 minutes, or until the chicken is cooked through and the breadcrumb coating is golden brown and crispy. The exact cooking time will depend on the thickness of your chicken strips and your oven. To ensure even cooking and crisping, I recommend flipping the chicken tenders halfway through the baking process, around the 8-10 minute mark. This ensures both sides get beautifully browned and crunchy.
Checking for Doneness and Serving
After the baking time is up, carefully check one of the chicken tenders for doneness. The internrum extracttemperature of the chicken should reach 165°F (74°C) when checked with a meat thermometer. The breadcrumb coating should be a deep golden brown and feel firm to the touch. If they aren’t quite there yet, continue baking for a few more minutes, keeping a close eye on them to prevent burning. Once they’re perfectly cooked and crispy, remove the baking sheets from the oven. Let the crispy baked chicken tenders rest on the baking sheets for a couple of minutes before serving. This allows the juices to redistribute, ensuring tender chicken. These are fantastic served immediately with your favorite dipping sauces like honey mustard, ranch, or ketchup. They’re also great in salads or wraps.

Conclusion:
There you have it – a foolproof guide to making the most incredibly Crispy Baked Chicken Tenders right in your own oven! We’ve covered everything from selecting the best chicken to achieving that perfect golden-brown, crunchy exterior without the mess of frying. These tenders are a weeknight hero, offering a healthier alternative to their fried counterparts while delivering on flavor and texture. They’re incredibly versatile and always a crowd-pleaser, perfect for a quick lunch, a family dinner, or even an appetizer at your next gathering.
For serving suggestions, consider pairing your Crispy Baked Chicken Tenders with your favorite dipping sauces like honey mustard, ranch, or BBQ sauce. They also make a fantastic addition to salads or served alongside roasted vegetables and mashed potatoes. Feeling adventurous? Try adding a sprinkle of paprika or garlic powder to the breadcrum extractb mixture for an extra flavor kick, or swap out the traditional Panko for crushed cornflakes for a different kind of crunch. Experimenting with herbs like parsley or chives in the coating is also a wonderful way to personalize this recipe. I truly hope you enjoy making and devouring these delicious chicken tenders as much as I do!
FAQs
What is the best way to ensure my chicken tenders are extra crispy?
The key to ultimate crispiness lies in a few crucial steps. First, ensure your chicken is patted completely dry before coating. This helps the breading adhere better. Using Pankrum extractreadcrumbs is highly recommended as they are larger and create a lighter, crispier coating thanrum extractandard breadcrumbs. Also, make sure the baking sheet is properly greased or lined with parchment paper to prevent sticking and allow for even heat circulation. Finally, baking them on a wire rack set inside the baking sheet allows air to circulate all around the tender, promoting an all-over crispiness.
Can I make Crispy Baked Chicken Tenders ahead of time?
While they are best enjoyed fresh from the oven for maximum crispness, you can certainly prepare them ahead of time. You can bread the chicken tenders and store them in a single layer on a baking sheet lined with parchment paper in the refrigerator for up to 24 hours before baking. Alternatively, you can bake them and then reheat them in a preheated oven at around 375°F (190°C) for 5-10 minutes until warmed through and re-crisped. Keep in mind that the crispiness might not be quite as intense as when they are freshly baked.
Crispy Baked Chicken Tenders – Easy Healthy Dinner
An easy and healthy recipe for crispy baked chicken tenders, perfect for a weeknight dinner.
Ingredients
-
1 lb boneless, skinless chicken breasts or chicken tenders, cut into uniform strips
-
2 large eggs, lightly beaten
-
1 cup Panko breadcrumbs
-
1/2 cup grated Parmesan cheese
-
1 teaspoon garlic powder
-
1 teaspoon paprika
-
1/2 teaspoon onion powder
-
1/2 teaspoon salt
-
1/4 teaspoon black pepper
-
Olive oil spray
Instructions
-
Step 1
Preheat your oven to 400°F (200°C). Line two large baking sheets with parchment paper or aluminum foil. Lightly grease if using foil. -
Step 2
Set up a breading station with three shallow dishes. In the first, place beaten eggs. In the second, combine Panko breadcrumbs, Parmesan cheese (if using), garlic powder, paprika, onion powder, salt, and black pepper. Whisk thoroughly. -
Step 3
Dip each chicken tender strip into the beaten eggs, then into the breadcrumb mixture, pressing firmly to ensure a complete coating. Place breaded tenders on prepared baking sheets in a single layer. -
Step 4
Lightly spray the tops of the breaded chicken tenders with olive oil spray. Bake for 15-20 minutes, flipping halfway through, until golden brown and cooked through. -
Step 5
Check for doneness (internal temperature of 165°F/74°C). Let rest for a couple of minutes before serving with your favorite dipping sauces.
Important Information
Nutrition Facts (Per Serving)
It is important to consider this information as approximate and not to use it as definitive health advice.
Allergy Information
Please check ingredients for potential allergens and consult a health professional if in doubt.