Easter Bunny Chick Cupcakes- Cute & Easy Recipe
Easter Bunny and Chick Cupcakes are an absolute must-have for any festive spring celebration! There’s something so undeniably joyful about these adorable treats that instantly brings smiles to faces of all ages. Who can resist the charm of fluffy bunny ears peeking out of a cupcake, or the bright, cheerful presence of a tiny yellow chick? These aren’t just cupcakes; they’re edible works of art that embody the spirit of Easter. They’re the perfect way to add a touch of magic to your Easter brunch, a delightful centerpiece for your dessert table, or simply a sweet surprise to share with loved ones. Get ready to hop into some baking fun and create these delightful Easter Bunny and Chick Cupcakes that are guaranteed to be a showstopper.
Let’s Make Some Magic!
Why you’ll adore these Easter treats:
These aren’t your average cupcakes. The combination of tender cake, creamy frosting, and playful decorations makes them incredibly special. The sheer delight on kids’ faces when they see these little characters is payment enough for the effort. Plus, they’re surprisingly easy to customize, allowing for your own creative flair. Whether you’re a seasoned baker or just starting out, these Easter Bunny and Chick Cupcakes are accessible and immensely rewarding to make.
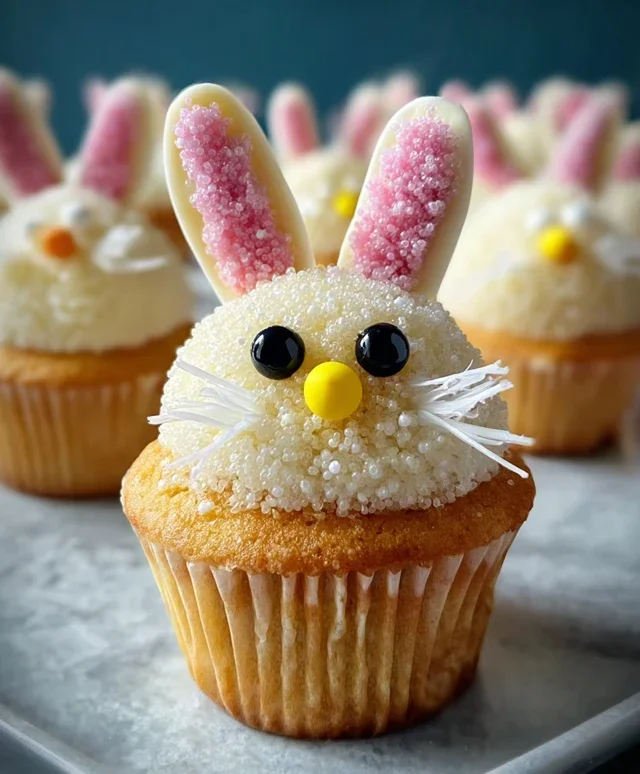
Easter Bunny and Chick Cupcakes
Easter is a magical time, filled with joy, family, and of course, delicious treats! These adorable Easter Bunny and Chick Cupcakes are the perfect way to add a burst of festive fun to your celebrations. They’re not only super cute but also incredibly easy to make, making them a fantastic activity to do with the kids. Imagin extracte the delight on their faces when they see these charming characters adorning their dessert table! We’ll be transforming simple vanilla cupcakes into a delightful duo of fluffy bunnies and cheerful chicks, guaranteed to be a hit with everyone, young and old. So, let’s get our aprons on and dive into the sweet world of Easter baking!
Ingredients:
Preparing the Cupcakes
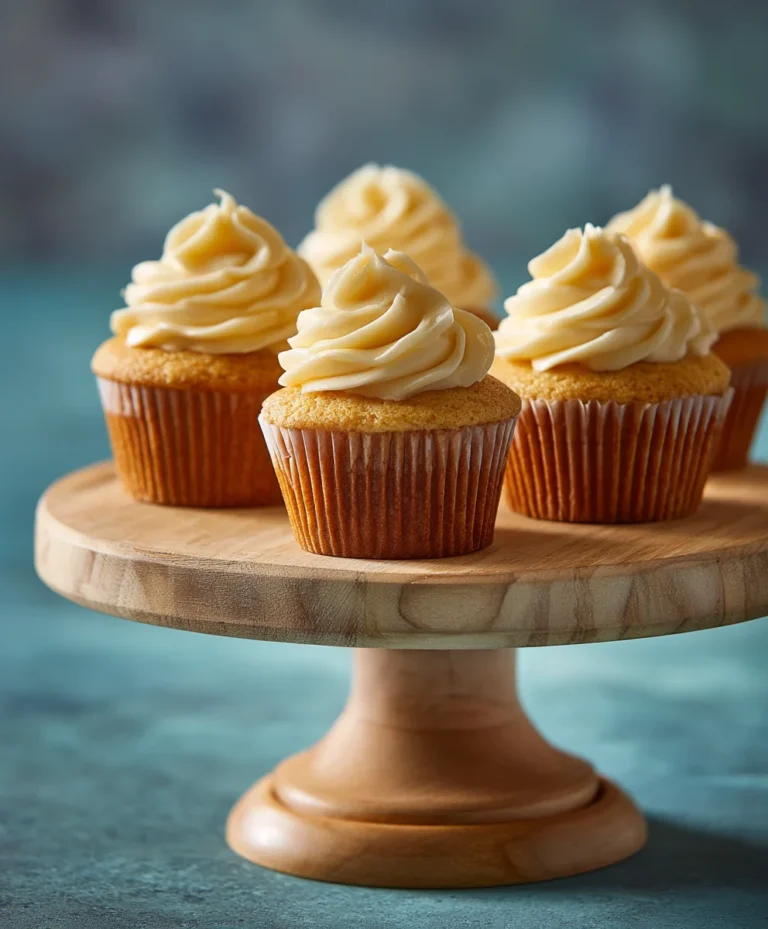
First things first, we need our cupcake base. You can follow your tried-and-true vanilla cupcake recipe or use a good quality cake mix for convenience. Whichever you choose, prepare your batter according to the package or recipe instructions. Make sure not to overmix the batter, as this can result in tough cupcakes. Once your batter is ready, evenly distribute it into your prepared cupcake liners, filling each about two-thirds full. This allows them to rise beautifully without overflowing. Bake them according to your recipe’s directions, typically around 18-22 minutes, or until a toothpick inserted into the center comes out clean. The aroma of freshly baked cupcakes is one of the best parts of baking, isn’t it? Let your cupcakes cool completely on a wire rack before we move on to the decorating magic. This step is crucial; decorating warm cupcakes will result in a melted, messy disaster, and nobody wants that!
Making the Frosting
While our cupcakes are cooling, let’s prepare our frosting. If you’re making your frosting from scratch, ensure it’s light and fluffy. A good buttercream or cream cheese frosting works wonderfully. For the chick cupcakes, we’ll need to add a vibrant yellow hue. Take a portion of your prepared frosting and gradually add yellow food coloring. Start with just a few drops and mix thoroughly. Continue adding color until you achieve a cheerful, bright yellow, reminiscent of a fluffy baby chick. Be careful not to add too much at once, as it’s easier to add more than to take away color. For the bunny cupcakes, we’ll keep our frosting a pure white.
Creating the Easter Bunny Cupcakes
Now for the fun part – transforming these plain cupcakes into adorable Easter bunnies!
1. Frosting the Base: Take a cooled vanilla cupcake and generously frost the top with your fluffy white frosting. You can use an offset spatula for a smooth, even coat, or for a more rustic, fluffy look, pipe the frosting on using a large round tip. The key is to create a nice, substantial layer of frosting that will serve as our bunny’s body and head.
2. Adding the Bunny Ears: For the bunny ears, we’ll use marshmallows. Take two large marshmallows and cut them in half diagonally. These will be our bunny ears. Dip the cut edge of each marshmallow half into the pink colored sanding sugar. This gives our bunny a sweet, pink inner ear. Gently press the sugared end of each ear into the frosted cupcake, positioning them upright and slightly apart to resemble bunny ears. You can use a toothpick to help hold them in place while the frosting sets a little.
3. The Bunny Face: Now for the bunny’s adorable face. Use two mini marshmallows for the bunny’s eyes. You can leave them as they are, or for a slightly more defined look, you can dot a tiny bit of black decorator icing in the center of each mini marshmallow to create pupils. For the bunny’s nose, take a pink jelly bean and press it gently into the center of the cupcake, just below the eyes. You can also use a small dab of frosting to secure it if needed. Finally, use the black decorator icing to draw a tiny mouth, a delicate “Y” shape, just below the jelly bean nose.
Crafting the Cheerful Chick Cupcakes
Let’s bring these little chicks to life!
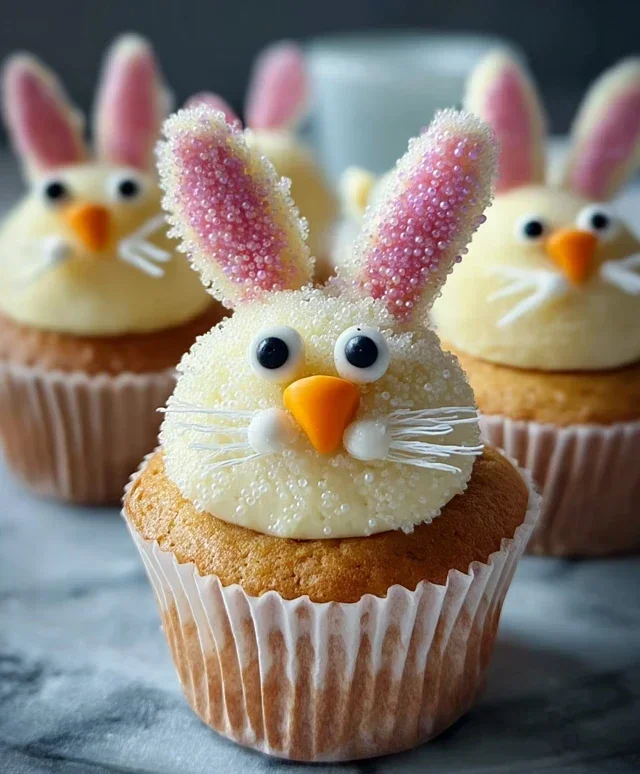
1. Yellow Frosting Application: Take a cooled vanilla cupcake and generously frost the top with your prepared yellow frosting. Again, you can use an offset spatula for a smooth finish or a piping bag with a round tip for a textured, fluffy appearance. We want a nice, domed shape to mimic a fluffy chick.
2. Chick Beaks and Eyes: For the chick’s beak, take a piece of orange colored gum or an orange M&M. Gently press it into the front of the yellow frosting, just below the center, to create a cute little beak. For the eyes, use two small dots of black decorator icing placed above the beak. You can also use two very small white sprinkles with a tiny dot of black icing on top for more defined eyes.
3. Adding Texture and Detail: To give our chicks a more defined, fluffy texture, you can use a fork or a toothpick to gently create feather-like lines in the yellow frosting. Don’t be afraid to be a little playful here! For an extra touch of Easter cheer, you can lightly sprinkle some yellow and white sprinkles around the base of the cupcake or just a few on top, mimicking little downy feathers.
Enjoy these delightful Easter Bunny and Chick Cupcakes! They are perfect for Easter gatherings, classroom parties, or just a fun way to celebrate the season with your loved ones. Happy baking!
Conclusion:
These Easter Bunny and Chick Cupcakes are an absolute delight, perfect for adding a touch of whimsical charm to your spring celebrations! The combination of a moist, fluffy cupcake base and adorable, edible decorations makes them a guaranteed hit with both kids and adults alike. They’re not just visually appealing; the classic vanilla or chocolate flavors are universally loved, ensuring everyone at your gathering will find them delicious. I find them to be one of my favorite Easter baking projects because of how much joy they bring!
For serving, these cupcakes are fantastic on their own as a sweet treat. They also make wonderful additions to an Easter dessert table, alongside hot cross buns or a festive fruit salad. Imagin extracte presenting a platter of these cheerful bunnies and chicks – they’re sure to be a conversation starter! You can also package them individually as party favors for an Easter egg hunt or a classroom party.
If you’re feeling adventurous, consider variations! For the bunnies, you could use pink frosting for the ears or add tiny edible candy eyes. For the chicks, experiment with different shades of yellow frosting for a more natural look, or even add a tiny sprinkle of orange zest to the batter for a subtle citrus note. The possibilities for these Easter Bunny and Chick Cupcakes are truly endless, so don’t hesitate to get creative. I encourage you to give this recipe a try – it’s a wonderfully rewarding and fun baking experience!
Frequently Asked Questions:
Can I make the cupcakes ahead of time?
Yes, you absolutely can! The cupcakes themselves can be baked a day in advance and stored in an airtight container at room temperature. For the best results, I recommend decorating them the day you plan to serve them, as the frosting can sometimes dry out or get a bit sticky if left out for too long.
What if I don’t have piping bags for the decorations?
No problem at all! For simple decorations like the chick’s fluff or the bunny’s tail, you can use a sturdy zip-top bag with a corner snipped off. For more detailed piping, you can also use a spatula or even a spoon to carefully shape the frosting. Even with simpler tools, these Easter Bunny and Chick Cupcakes will still look incredibly charming!
Are there any dairy-free or gluten-free options for this recipe?
Certainly! You can easily adapt this recipe to be dairy-free by using plant-based milk (like almond or soy milk) and a dairy-free butter substitute in the cake and frosting. For gluten-free options, a good quality gluten-free all-purpose flour blend can be used in place of traditional flour. Just be sure to follow the instructions for your chosen gluten-free flour, as they can sometimes vary in their liquid absorption.
Easter Bunny and Chick Cupcakes
Adorable and festive cupcakes perfect for Easter celebrations, featuring bunny and chick designs made with simple frosting and candy decorations.
Ingredients
-
1 recipe Vanilla Cupcakes (or your favorite cake mix)
-
1 recipe Fluffy Vanilla Frosting (or store-bought frosting)
-
Yellow and white sprinkles
-
Large and mini marshmallows
-
Pink colored sanding sugar
-
Black decorator icing
-
Jelly beans (pink for bunny noses)
-
Orange colored gum or M&Ms (for chick beaks)
-
Yellow food coloring (for chick frosting)
Instructions
-
Step 1
Bake vanilla cupcakes according to your favorite recipe or cake mix instructions and let them cool completely. -
Step 2
Prepare the frosting. For chick cupcakes, tint a portion of the white frosting with yellow food coloring until a bright yellow is achieved. -
Step 3
For bunny cupcakes: Frost each cooled cupcake with white frosting. Press two large marshmallows onto the top side of each cupcake for ears. Use black decorator icing to draw eyes and a mouth on the face of the cupcake. Place a pink jelly bean in the center for the nose. Optionally, add pink sanding sugar to the marshmallow ears. -
Step 4
For chick cupcakes: Frost each cooled cupcake with the yellow-tinted frosting. Place two mini marshmallows on the top half of the cupcake for eyes. Use black decorator icing to dot pupils on the mini marshmallows. Place an orange gum or M&M below the eyes for the beak. -
Step 5
Decorate the cupcakes further by sprinkling yellow and white sprinkles around the base or on the frosting as desired. -
Step 6
Arrange the finished bunny and chick cupcakes on a platter for your Easter celebration.
Important Information
Nutrition Facts (Per Serving)
It is important to consider this information as approximate and not to use it as definitive health advice.
Allergy Information
Please check ingredients for potential allergens and consult a health professional if in doubt.